This post may contain affiliate links. Please read our disclosure policy.
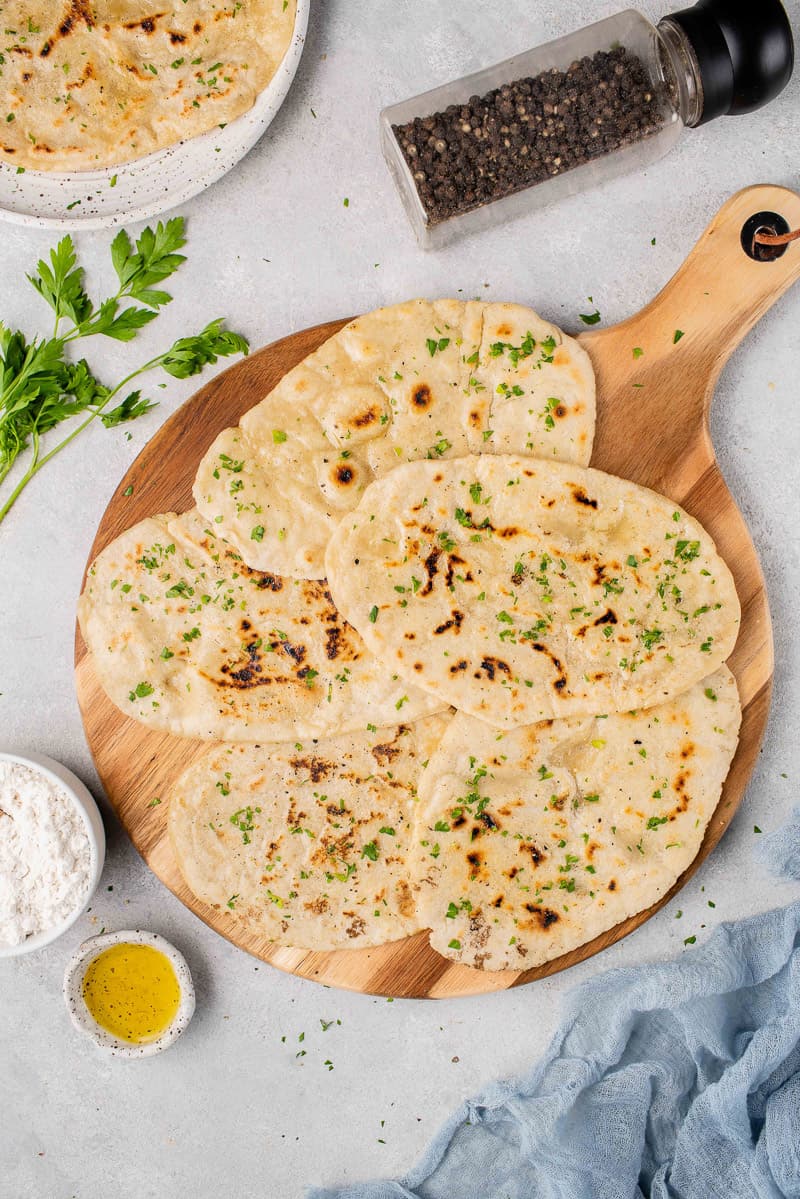
This soft and delicious gluten-free flatbread only requires 5 simple ingredients and is ready to eat in about 30 minutes. Pair with your favorite curries, soups, or use as a sandwich wrap or pizza base. The options are endless!
We are always getting requests for gluten-free bread on our blog and we wanted to finally make that happen. We got to testing in the kitchen and, well, let me just say it was at first a DISASTER.
But after doing some research, we realized that a gluten-free flatbread may be an easier bread to tackle because it requires no rising and no baking – and we were right! After a few rounds of testing, and a couple of chewy failures later, this fluffy gluten-free flatbread was born.
Ingredients You’ll Need
- Gluten-free flour: It is important to use a gluten-free all purpose flour blend as opposed to single flours such as almond flour, coconut flour, cassava flour, or chickpea flour. These blends are made with ingredients such as tapioca starch, xanthan gum, or potato starch that help give the flour an elasticity that mimics all-purpose wheat flour. We prefer to use the Bob’s Red Mill 1:1 Baking Flour as we have the most experience with this flour. All gluten-free flour blends are different and therefore we cannot guarantee that another blend will work.
- Oil: We used extra virgin olive oil, but you can use another neutral oil. Avocado oil, vegetable oil, or even coconut oil will work!
- Baking powder: Flatbread is traditionally made without leavening agents, but we found this gluten-free version needed a little bit of baking powder to make it lighter in texture.
- Vegan yogurt: For a neutral tasting flatbread, use unsweetened, plain yogurt. We have tested this flatbread using Forager, Silk, and So Delicious and all had good results. If you don’t have access to vegan yogurt, you can also substitute vegan buttermilk. Learn how to make it in this recipe: The Fluffiest Vegan Buttermilk Pancakes.
Equipment Needed
- Large mixing bowl
- Wooden spoon
- Rolling pin or wine bottle
- Cast iron griddle or skillet
- Spatula
- Pastry brush (optional)
How to Make Gluten-Free Flatbread
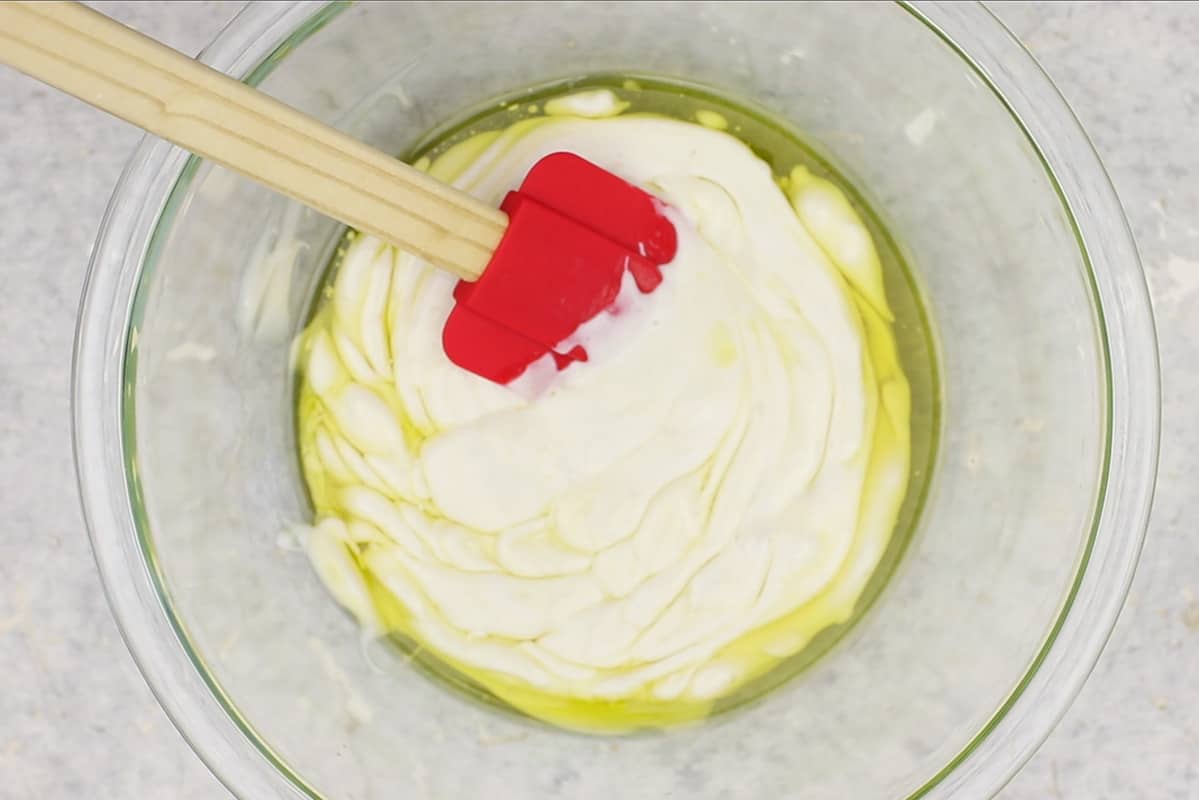
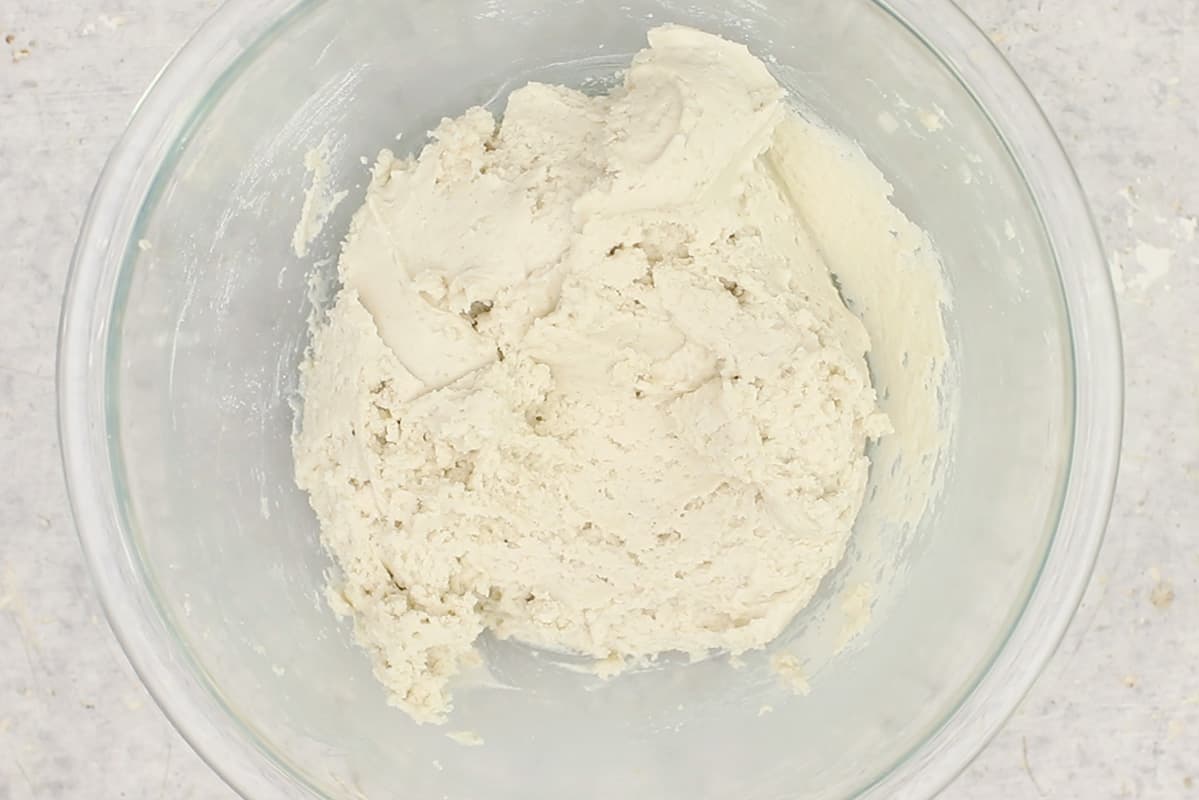
- Mix the wet ingredients. In a large bowl, mix together the vegan yogurt, olive oil, baking powder, and sea salt until uniform.
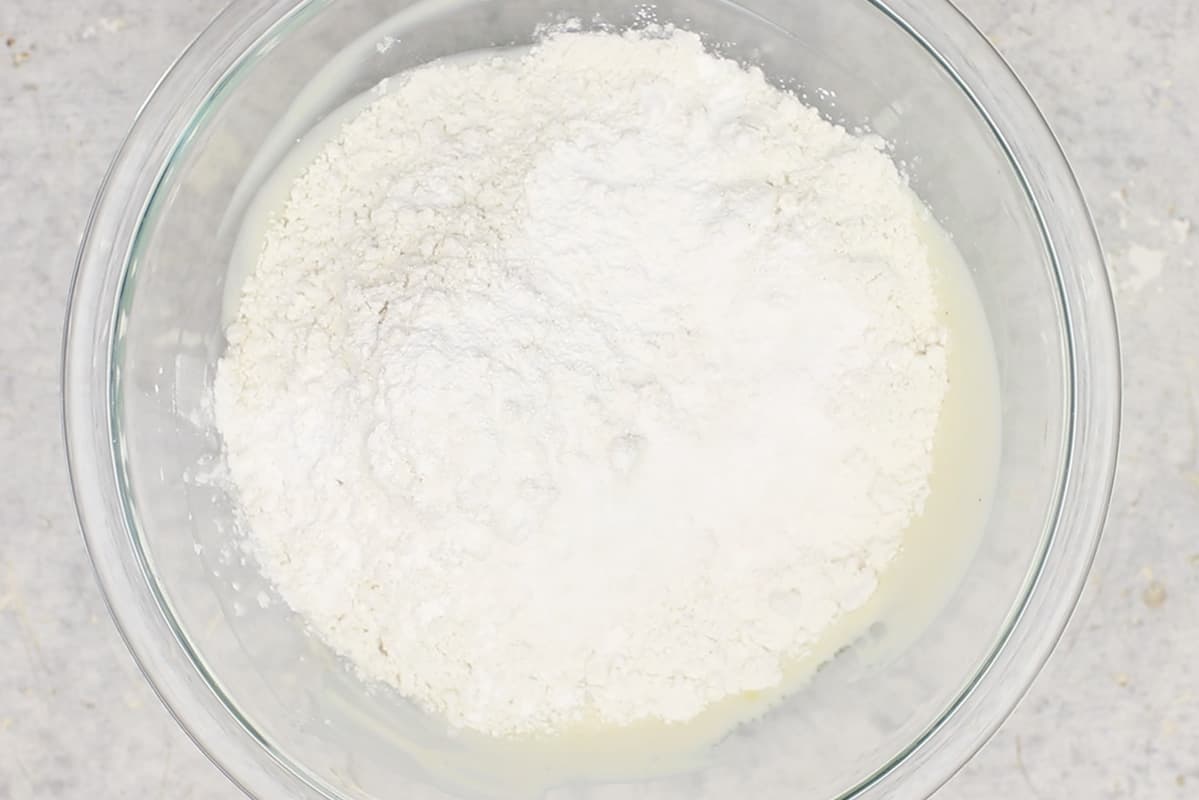
- Sprinkle flour overtop. Mix the flour into the wet ingredients until a dough forms. It should be smooth and soft. If the dough is too sticky, add additional flour, 1/2 tablespoon at a time, as needed. If the dough is too dry and crumbly, add water, 1/2 tablespoon at a time, until smooth and soft.
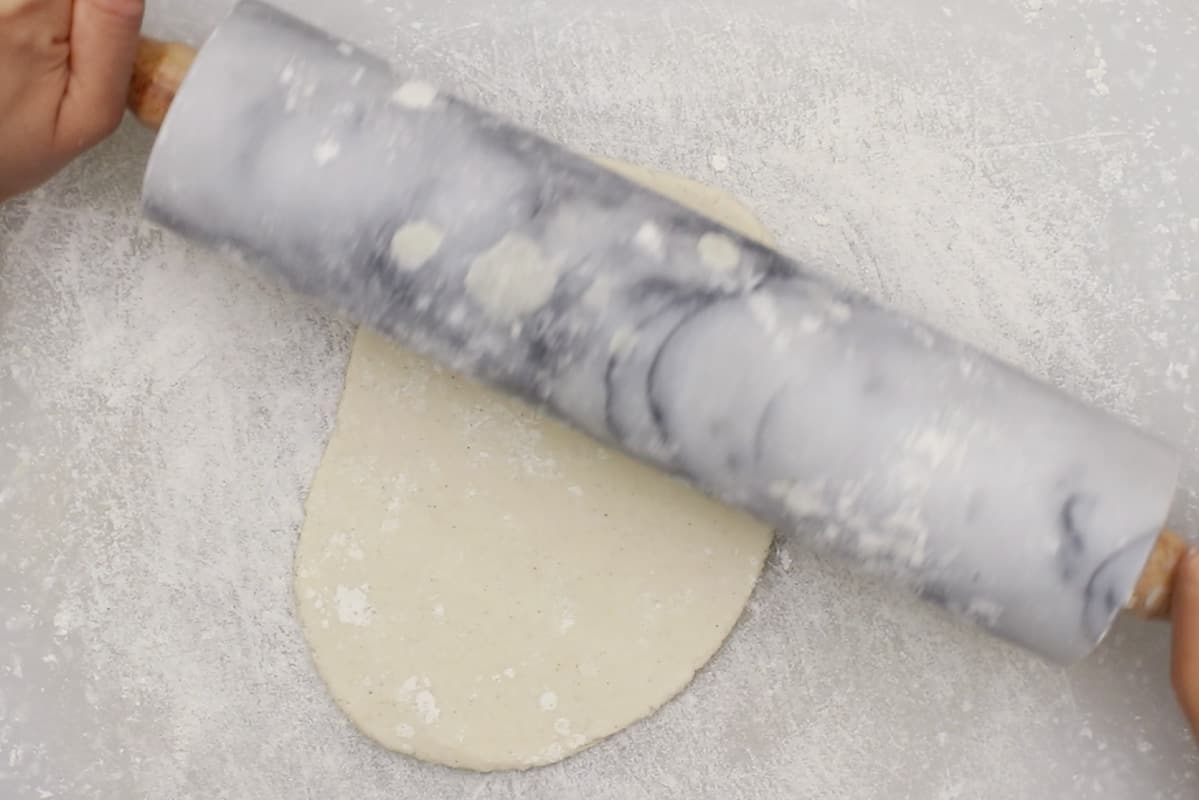
- Divide the dough into 8 equal pieces. Roll each section into a ball. One at a time, roll out the dough on a floured work surface until about 1/4-inch thick.
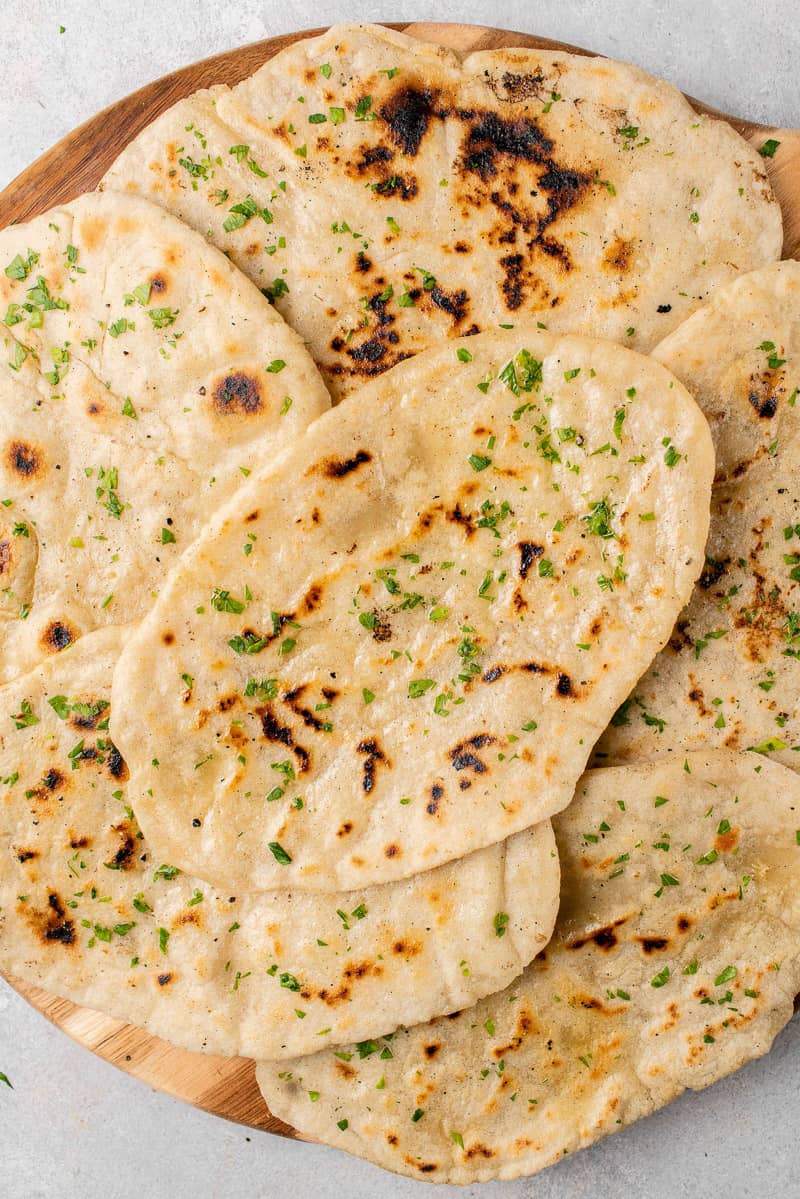
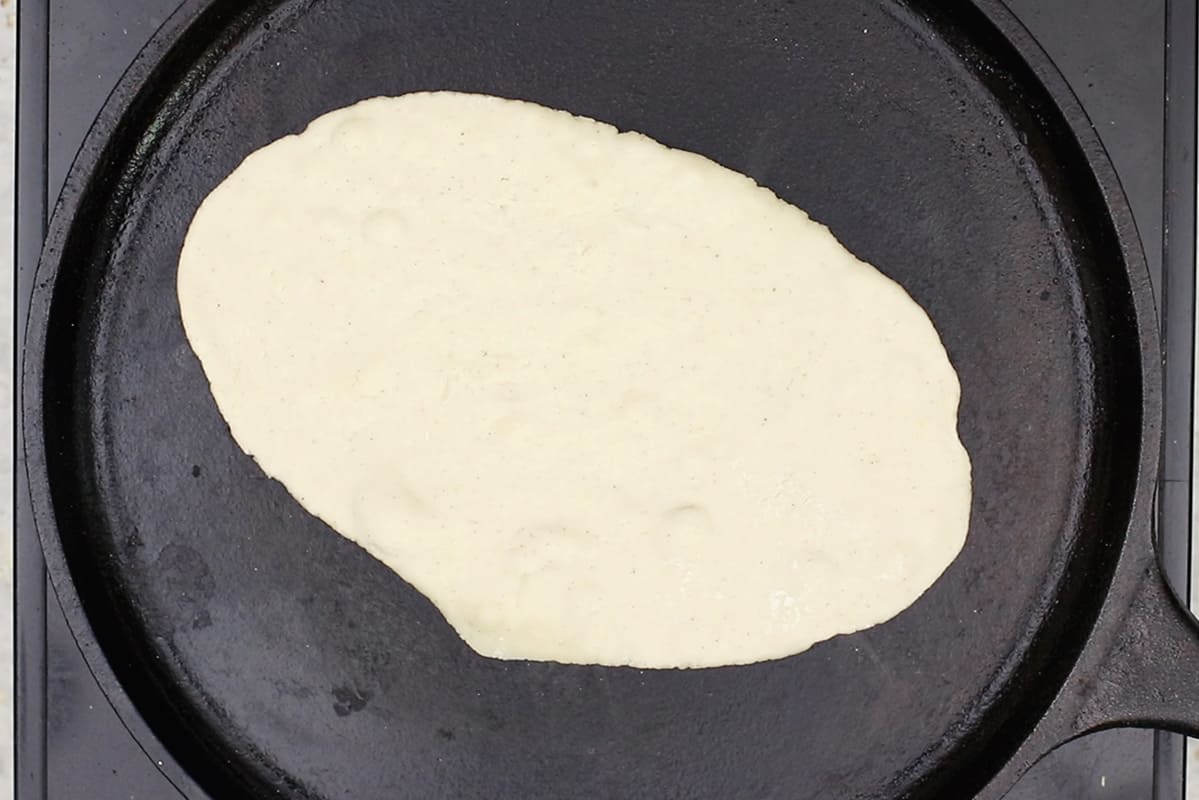
- Cook the flatbread. Transfer the dough onto a heated, greased pan and cook for 1 1/2 to 2 1/2 minutes on each side, or until browned and cooked through.
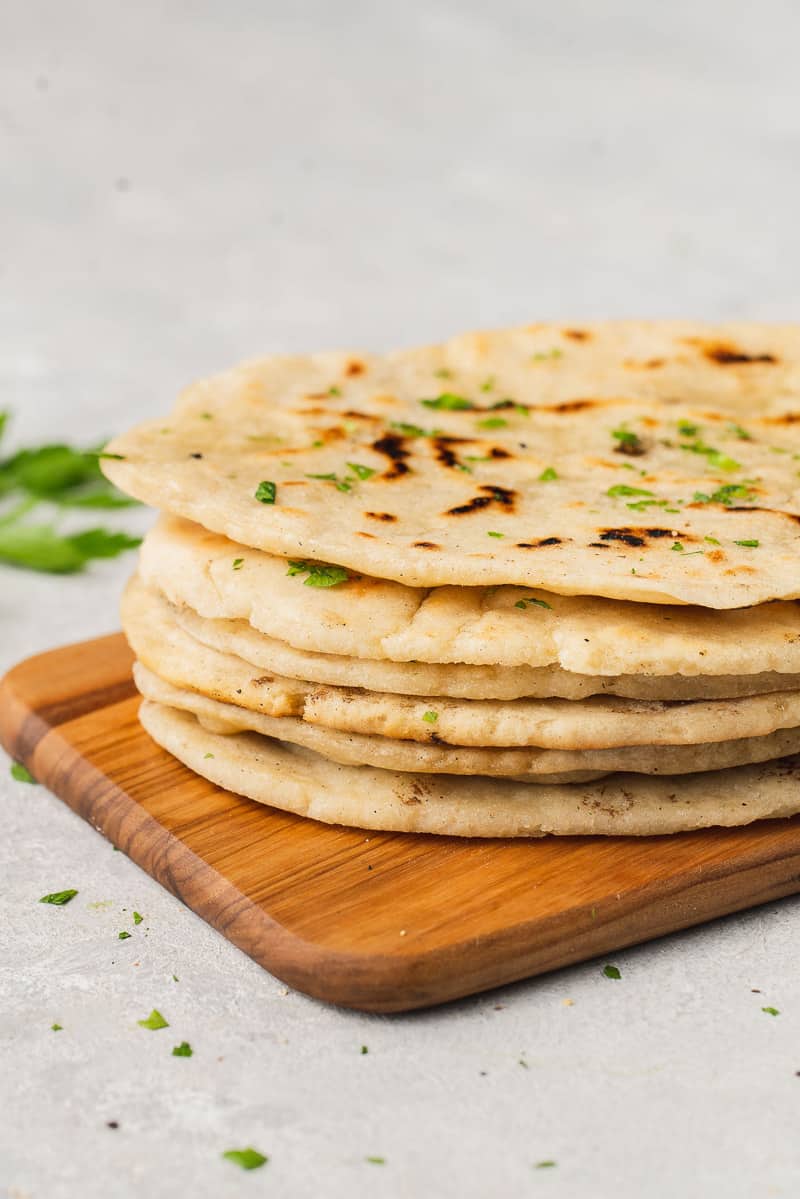
- Brush with optional garlic oil. Once cooked through, transfer the cooked gluten-free flatbread to a plate. If desired, brush with garlic olive oil or melted vegan butter mixed with garlic powder or roasted garlic. Finally, give it a generous sprinkle of fresh parsley.
- Repeat process with dough. Continue to roll out the dough balls and cook the gluten-free flatbread until you’ve cooked all the dough.
- Serve. Enjoy this easy gluten-free flatbread recipe warm or room temperature as desired!
What Should I Serve Homemade Flatbread With?
The best part about homemade gluten-free flatbread is there are tons of ways to use it! Here are some of our favorite ways to enjoy it:
- Use it as a pizza crust: If you don’t have time to let homemade pizza dough rise, swap in this flatbread as the crust. Try it with our White Pizza with Zucchini and Tomatoes or our Vegan Chicken Pesto Pizza.
- Enjoy with curry: Flatbread is similar to Indian naan and can be served with this Easy Vegan Chickpea & Cauliflower Curry, Curried Sweet Potato Soup, and Easy Vegan Butter Chicken.
- Serve with soup: You can never go wrong pairing soup with bread. Try this flatbread with any of our favorite soup recipes!
- Use as a sandwich wrap: Substitute the tortilla for flatbread and enjoy these Chickpea Salad Wraps and Mushroom Caesar Salad Wraps wrapped similarly to a gyro.
- Pair with protein: Serve this flatbread with proteins such as baked falafel, spiced chickpeas, or our easy crispy tofu and classic hummus for a delicious, simple meal.

Storage and Freezing Instructions
This gluten-free flatbread will keep best in an airtight container at room temperature for up to 6 days. This bread can be refrigerated, but refrigeration does make it more dense.
If you’d like to extend the life of your flatbread, we recommend freezing it. Allow the bread to cool completely on a wire cooling rack, then freeze in a large freezer bag such as a Stasher bag. To prevent any sticking, you can place a piece of parchment paper between each flatbread. When tightly sealed, frozen flatbread will keep for up to 3 months.
To thaw, simply set the frozen flatbread on the counter and allow to fully thaw at room temperature. Then reheat in a toaster oven or in a hot skillet until warmed through and pliable.
Expert Tips
- Cast iron works better than a non-stick pan. It helps it develop a nice golden brown crust and cooks the gluten-free flatbread through more quickly.
- Adjusting the amount of flour may be necessary. Gluten-free baking can be finicky and need adjustments based on many environmental factors and the brand of flour you use. If the dough is too wet, add additional flour. If the dough is too dry, add additional water.
- For best results, use weighted measurements when possible. If you own a baking scale, this is an excellent recipe to use it for! We provided grams measurements for each ingredient, but again, keep in mind this is specific to the brands we used. If you change the brands, this can change the measurements.
- Keep warm in a warmer drawer. If you want to prevent your gluten-free flatbread from getting cold while you’re cooking the batch, place the bread on a hot plate or baking sheet and stick them in the warmer drawer.
More Popular Gluten-Free Recipes You May Enjoy:
- Easy Baked Falafel Recipe – these pair perfectly with this flatbread, too!
- Walnut Taco Meat – a quick and easy meatless Monday taco filling.
- Easy Vegan Chicken Salad – this “chicken” salad is just as delicious as the classic, yet completely free of animal products!
- Sweet & Smoky Chickpea Burgers (Gluten-Free) – homemade veggie burgers made with high-protein chickpeas!
- Baked Mushroom & Potato Taquitos – Crispy taquitos filled with mashed potatoes and our walnut taco meat!
Make sure you tag us on Instagram @sweetsimplevegan and @consciouschris and hashtag #sweetsimplevegan if you recreate any of our recipes, we love to see your photos!
Print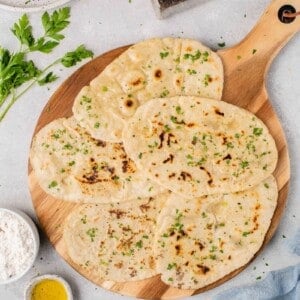
Easy Gluten-Free Flatbread Recipe
- Total Time: 35 minutes
- Yield: 8 flatbreads 1x
- Diet: Gluten Free
Description
This soft and delicious gluten-free flatbread only requires 5 simple ingredients and is ready to eat in about 30 minutes. Pair with your favorite curries, soups, or use as a sandwich wrap or pizza base. The options are endless!
Ingredients
- 1 1/3 cups (240g) unsweetened plain vegan yogurt (I used Forager)
- 8 teaspoons (36g) olive oil
- 2 teaspoons (9g) baking powder
- 1 teaspoon (9g) salt
- 2 cups + 1 1/2 tablespoons (314g) Bob’s Red Mill 1:1 Gluten-free Baking Flour + more as needed
Optional
- Garlic olive oil
- Fresh parsley, finely chopped (or herbs of choice)
Instructions
- In a large bowl, mix together the vegan yogurt, olive oil, baking powder and salt until uniform.
- Sprinkle the gluten-free flour over the wet mixture and mix it through until a dough forms. The goal here is to have a smooth and soft dough that does not crumble and that is not too sticky. If the dough is too sticky, add additional flour, 1/2 tablespoon at a time, as needed. If the dough is too dry, add water, 1/2 tablespoon at a time, as needed.
- Flour a clean work surface and preheat a greased pan over medium heat. We prefer to use a cast iron griddle or skillet for this as we have found it yields the best results vs. a non-stick pan. We also prefer to use our granite counters, a marble board or plastic cutting boards instead of a wooden one as we have found that it sticks less.
- Divide the dough into 8 and roll each into a ball. Place 1 ball on the floured work surface and using a rolling pin or an empty bottle, roll out the dough until it is about 1/4-inch thick. Transfer the dough onto the heated pan and cook for 1 1/2 to 2 1/2 minutes on each, or until browned and cooked through. Check the dough after 1 1/2 minutes to ensure that it is not burning. If it cooks too fast, lower your heat as needed. We often find that our first flatbread becomes the test for proper heat level/cooking time and the remaining flatbreads cook more efficiently and successfully.
- Transfer the cooked flatbread to a plate. If desired, brush it with the optional garlic olive oil and give it a generous sprinkle of parsley.
- Continue until you have cooked all of the dough. Serve warm. Store in an airtight container on the counter for 4-6 days.
Notes
- This recipe was adapted from Tasty.
- All gluten-free flour blends are different and therefore we cannot guarantee that another blend will work.
- Regular all purpose flour can work in place of the gluten-free flour of you are not gluten-free.
- Instead of garlic olive oil for brushing, you can also use melted vegan butter with garlic powder or fresh garlic that is sautéd until fragrant.
- We have tested this recipe with other vegan yogurt brands (Silk and So Delicious) and they work well in place of the Forager.
- You may need to adjust the flour as needed if the dough is too wet or add water if it is too dry. I shared the weights of the ingredients to try and prevent that!
- You can use any other oil in place of the olive oil in the bread.
- If you would like, you can mix seasonings or herbs into the dough as well to make it a flavored dough.
- Prep Time: 5 minutes
- Cook Time: 30 minutes
- Category: Appetizer, Side, Bread
- Method: Stovetop
Nutrition facts label provided by Nutri Fox.
Disclaimer: The nutritional information shown is an estimate provided by an online calculator. It should not be considered a substitute for a professional’s advice. This page may contain affiliate links, which simply means that we earn a commission if you purchase through those links, but your price remains the same. Thank you for supporting Sweet Simple Vegan!


This flatbread was so yummy!! I made it with Greek yogurt, so had to add a little extra water to get the right consistency for the dough since it’s a little thicker than regular yogurt, but it was such a delight. Even the non-GF eaters said it was really good. I brushed it with a little melted butter with garlic powder, salt, and fresh parsley. I’ll be making this recipe again and again!
Excellent recipe. Make them thinner than you think because they do rise a little.
My mom and I are gluten free and I have been craving flatbread for a little while and came across this recipe. I used regular yogurt instead of vegan and it was absolutely amazing!!! 🤩 I can’t tell you how awesome this recipe is and it’s so easy to make. Plus you can pair it with almost any dish. Five star, 100% recommend.
Tender and tasty flatbread! I used Measure For Measure gluten free flour, and it worked great! It took me a while to figure out that a hotter pan is better – and faster. The excess flour burned in the cast iron skillet, but it brushed right off and didn’t affect the flavor. I didn’t add the toppings, just ate them warm with vegan butter. I will never eat store- bought flatbread again!!
This is perfect!! Closest thing to actual Pita bread. Super simple. I subbed ingredients with stuff I had on hand. I used King Arthur all purpose gf flour and lactose-free milk that I mixed with vinegar. Regular vegetable oil. I cooked them in a little salted butter. Im super happy and I wish we could add pictures to reviews.
I cannot tell you how happy I am to have found this recipe. I made a half a recipe to see if I liked it before wasting ingredients. I did not have Bob’s Red-mill one to one, but I had King Arthur Measure for Measure gluten-free flour. These are absolutely amazing. I had one for lunch, stuffed with sautéed vegetables, hummus, roasted chickpeas, and shredded lettuce no breakage when you bend it to make a taco type.
This is a 10 star recipe no more paying almost 6 dollars for pita pockets
These were excellent – I made them with the King Arthur gluten-free 1:1 flour for non-yeasted recipes
My husband got diagnosed with celiac last year and LOVES flat bread and naan. So far this is the first gluten free flat bread recipe that I’ve found to be both easy and delicious. He said it didn’t even taste gluten free. Definitely going to be a staple in my household!
Hi Jasmine!
Your gluten free flatbread is soo good. I am always looking for a flat bread or naan that is gluten free vegan. Yours is the best!!
Thank you to you and Chris!!