This post may contain affiliate links. Please read our disclosure policy.
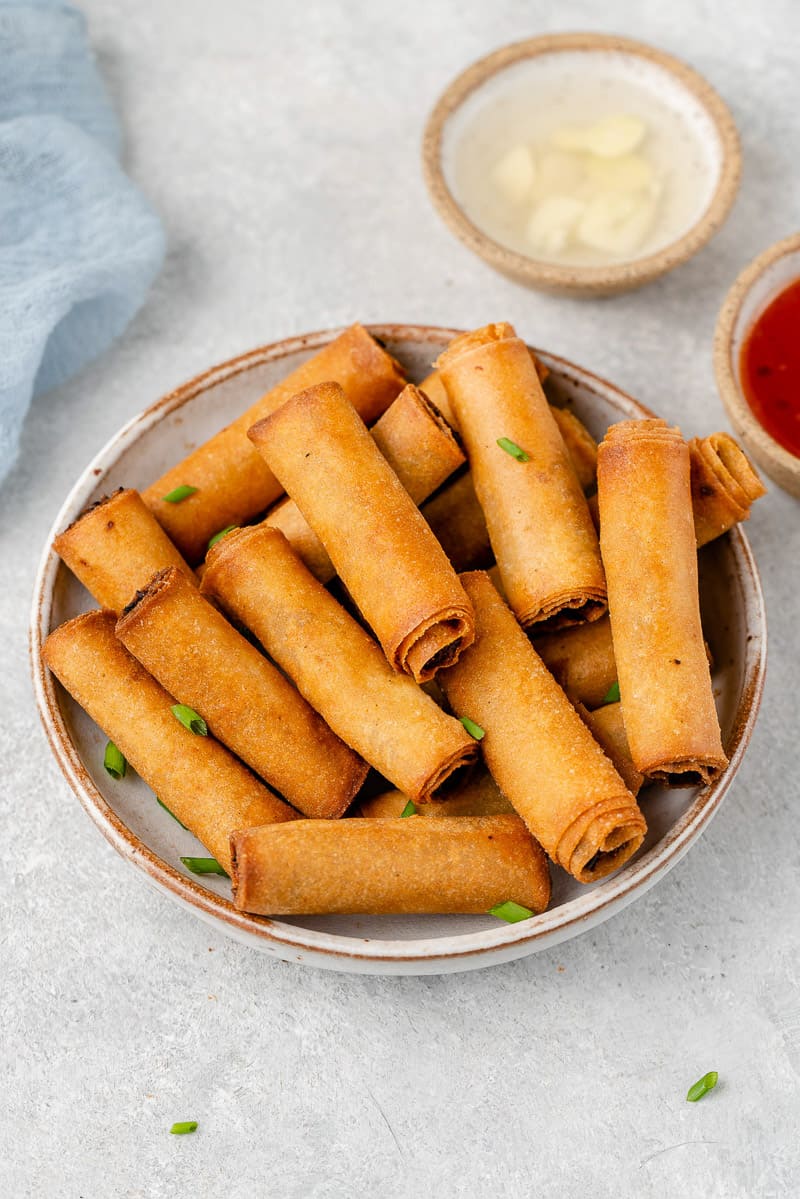
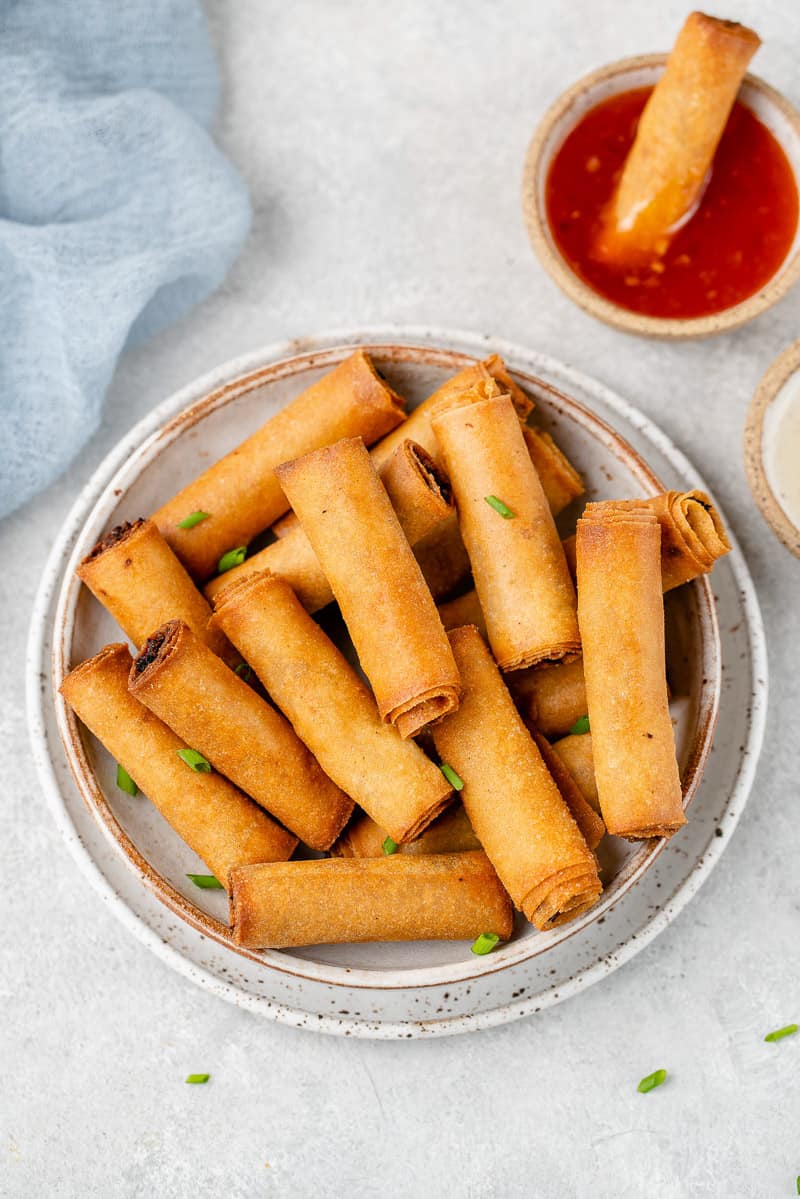
Learn how to make Vegan Filipino Spring Rolls aka Lumpiang Shanghai at home! These fried lumpia have the same exact taste and texture as the authentic recipe I grew up with, but are made with 10 simple plant-based ingredients. Deep fry or air fry Lumpiang Shanghai until golden brown and crispy and serve with your favorite dipping sauces.
What is Lumpiang Shanghai?
Lumpiang Shanghai is regarded as the most basic type of lumpia (fried spring rolls) in Filipino cuisine. Lumpia originated in Fujian, China, but the Lumpiang Shanghai that is made and served in the Philippines today has been nativized over the years and is now a different recipe altogether.
This version in particular differs from other types of Filipino lumpia, such as Turon (Banana Lumpia), due to its small size and thinner dough.
Traditional Lumpiang Shanghai is usually filled with ground meat (pork or beef) and sometimes even shrimp and beaten eggs. Obviously none of those ingredients are vegan, so I created a vegan version with the same authentic taste and texture.
After a dozen rounds of testing, I finally perfected these authentic vegan spring rolls and got the seal of approval from my family’s taste test! Trust me, if they approve of these Lumpiang Shanghai, then it is for sure the real deal. And if you haven’t already, try my other lumpia recipes: Turon (Banana Lumpia) and Dynamite Lumpia (Lumpiang Dinamita).
For reference, vegan spring rolls, lumpia and Lumpiang shanghai will be used interchangeably in this post.
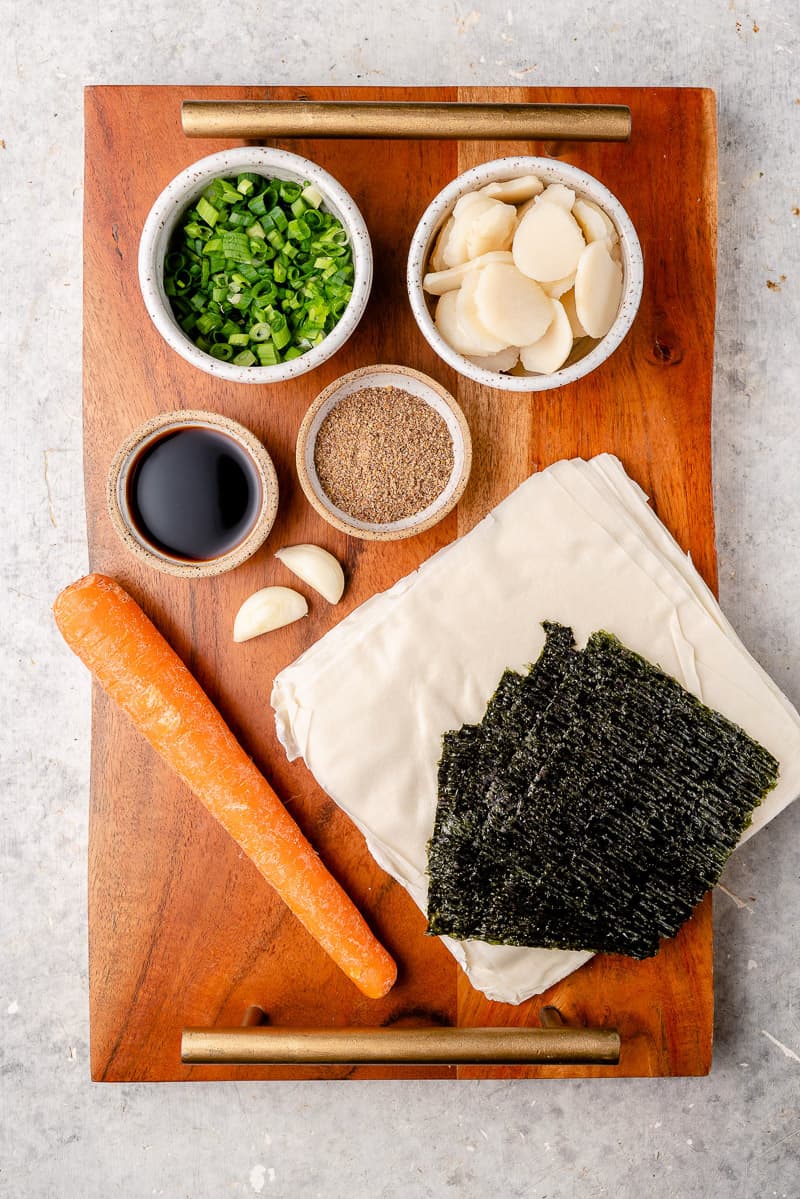
Ingredients You’ll Need
- Flax eggs: Several authentic versions of Lumpiang Shanghai are made with eggs to help add fat and bind the filling together. We’ve used flax eggs, one of our favorite vegan egg substitutes, to bind the filling together with omega-rich, plant-based ingredients.
- Water chestnuts: Adds a slight crunch and essential moisture that helps bind the filling together and keeps it moist.
- Green onions and garlic: Instead of or even in addition to green onions, feel free to opt for white or yellow onions. They may add a bit more moisture to the filling, but it should still hold together well.
- Carrot: For best results, we’d recommend fresh carrots over frozen. Frozen will make the filling too wet and is better suited for recipes such as Rainbow Summer Rolls.
- Nori: Nori, or seaweed, adds saltiness and the taste of the sea. It’s also rich in iodine, an essential nutrient.
- Plant-based ground beef: Impossible Food’s plant-based ground beef is my favorite in this recipe. I also tested these vegan spring rolls using Beyond Meat and found the “Beyond Meat” taste too overpowering. Feel free to use your favorite vegan ground beef crumbles.
- Soy sauce: Adds saltiness and umami flavor. If making gluten-free, opt for tamari.
- Lumpia or spring roll wrappers: I purchase my lumpia wrappers from my local Asian market in the refrigerated or freezer sections. If you do not have a local Asian market near you, you may be able to find them in larger grocery stores too.
- Oil: The oil is used for frying the vegan spring rolls. Choose an oil with a high smoke point – vegetable oil or canola oil are good choices.
Equipment Needed
- Mixing bowls
- Food processor
- Large pot (for frying)
- Kitchen shears or sharp scissors
- Plate or platter and paper towels
- Slotted spoon
How to Make Vegan Spring Rolls

- Defrost your spring roll wrappers: If your wrappers are frozen, thaw them according to the package directions or the night before in the refrigerator.
- Make the flax eggs. In a small mixing bowl, whisk together the flaxseed meal and water until well combined. Set aside for 15 minutes to thicken.
- Finely chop the veggies. In the bowl of a large food processor, add in the water chestnuts, green onions, carrot, nori, and fresh garlic. Process until finely chopped and uniform in consistency.
- Make the filling. Transfer the mixture to a large bowl along with the vegan ground beef crumbles, soy sauce, salt and pepper, and flax eggs. Mix well until evenly combined. Set aside.
- Heat your frying oil. Fill a large, deep pot with 2-3 inches of frying oil and heat it to 350 degrees Fahrenheit.
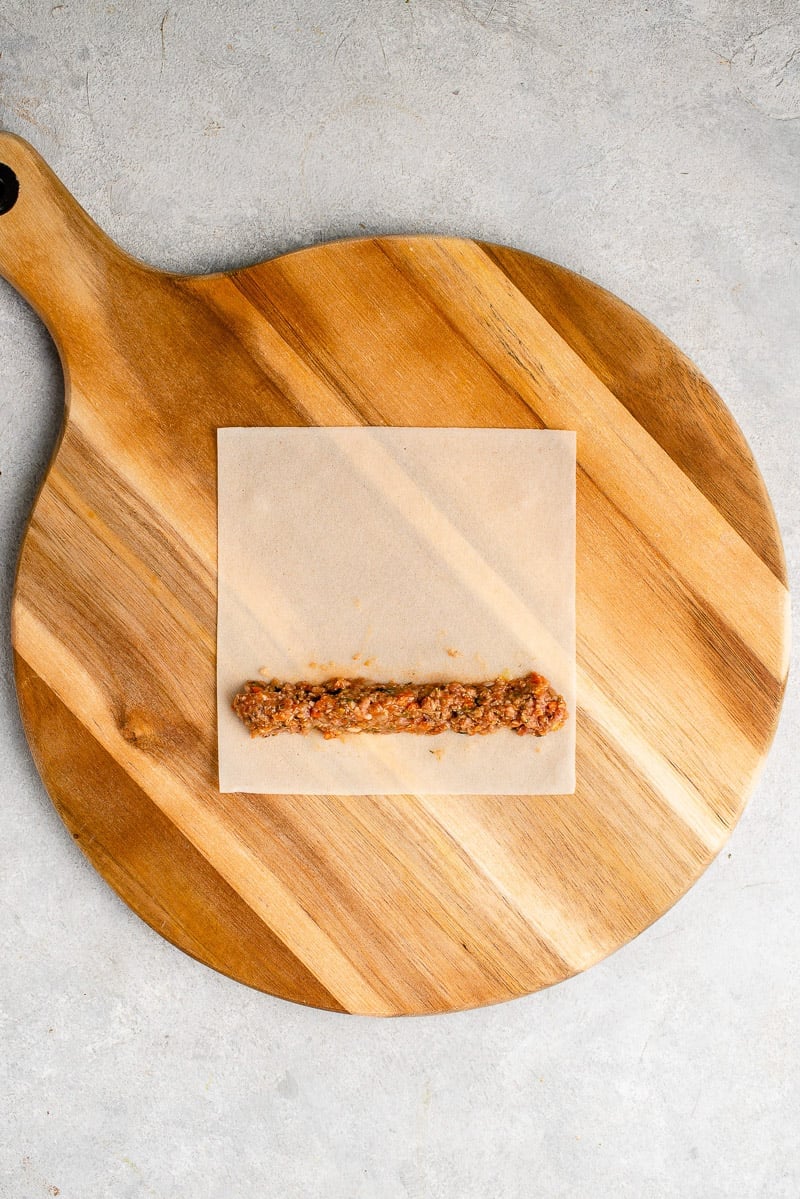
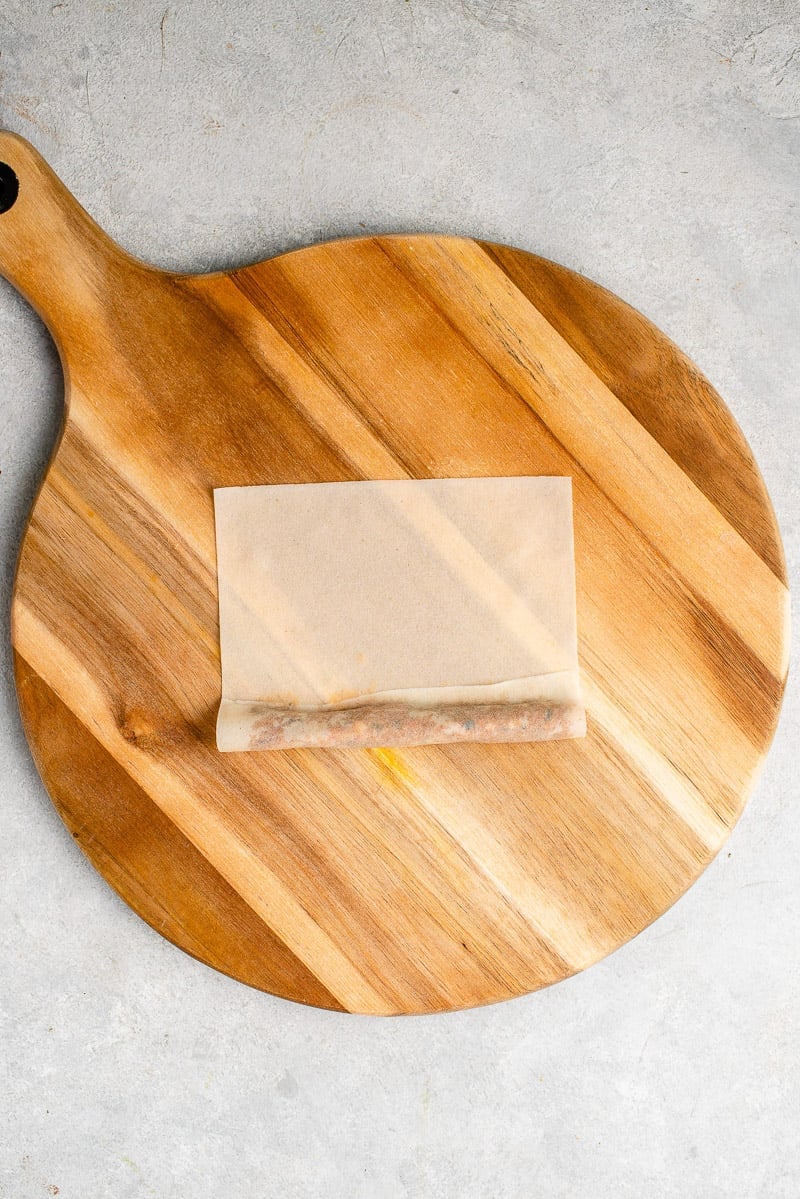
- Fill the vegan spring rolls. Carefully peel one sheet of the wrapper off of the pile and place it on a clean work surface (in a square, not a diamond). Place 1 ½ tablespoons of filling toward the bottom of the wrapper and spread it out into a long line.
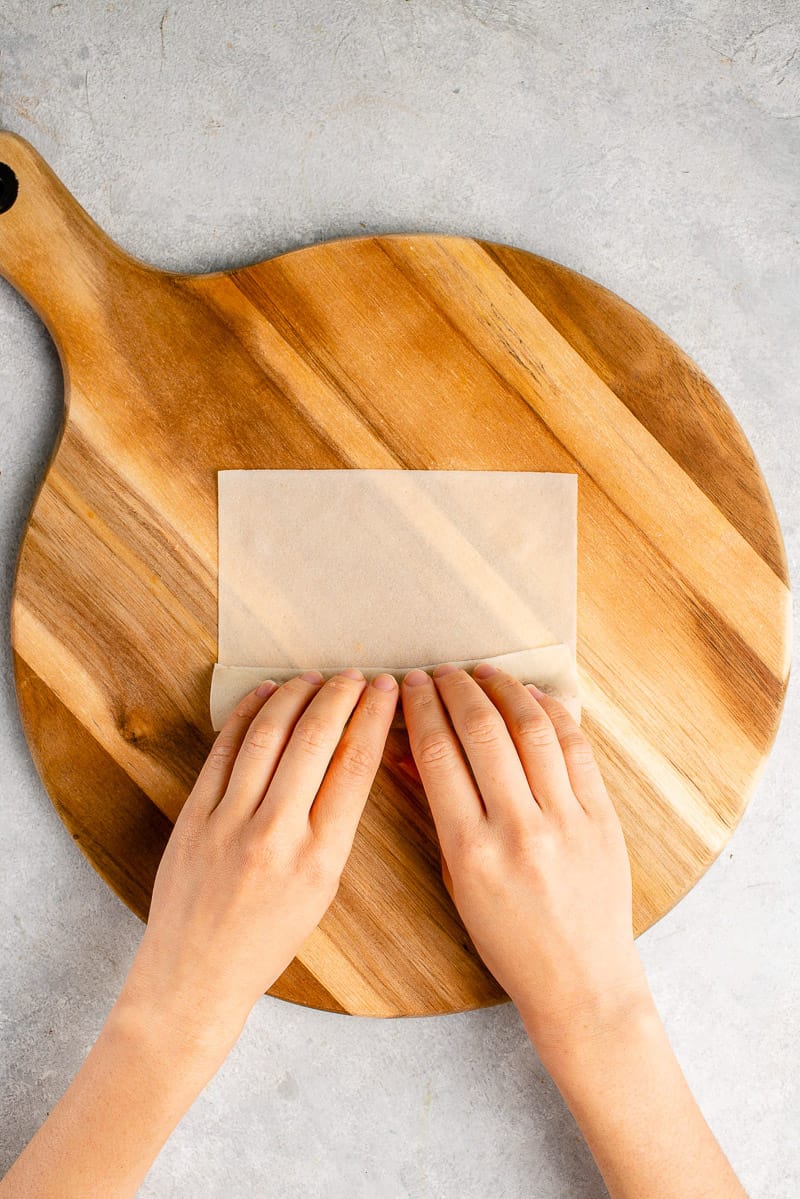
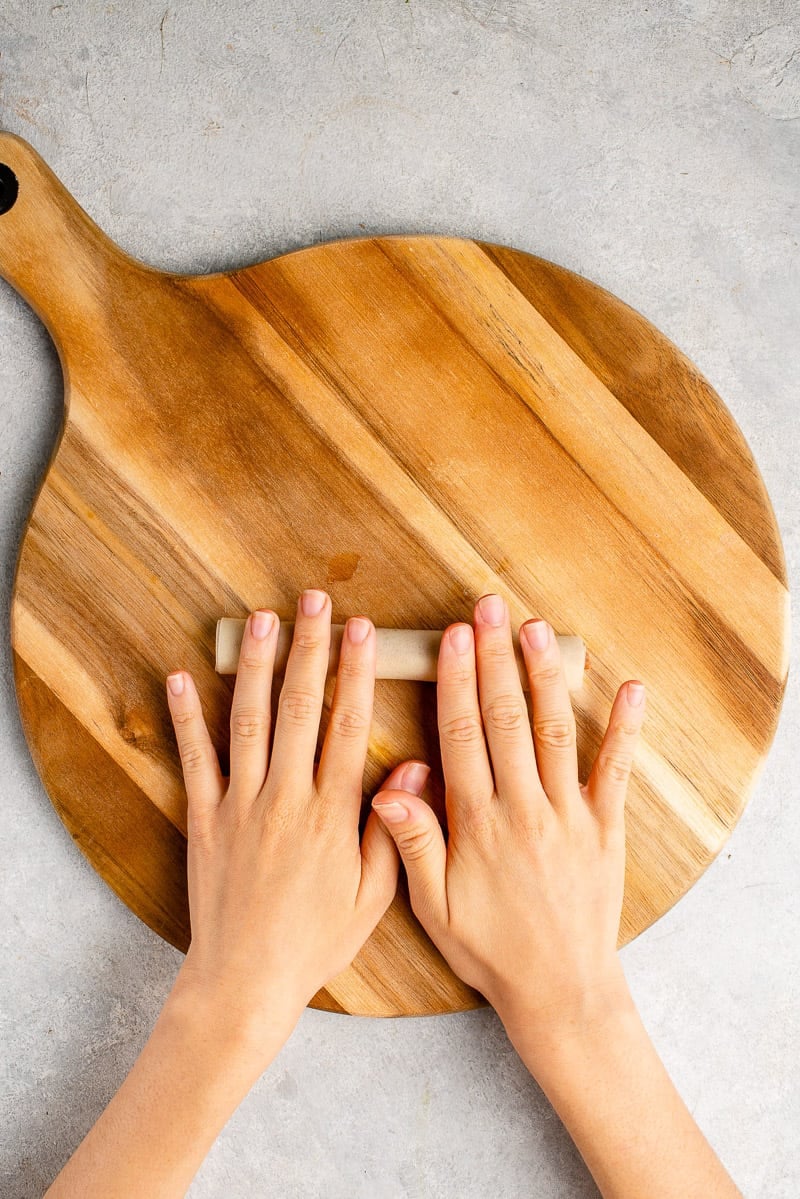
- Roll the spring rolls. Fold the bottom over the filling and tightly tuck it under. Roll the Lumpiang Shanghai tightly into a long cigar shape. Dip your fingers into the cup of water and wet the ends of the wrapper. Roll the lumpia over the end and make sure it sticks.
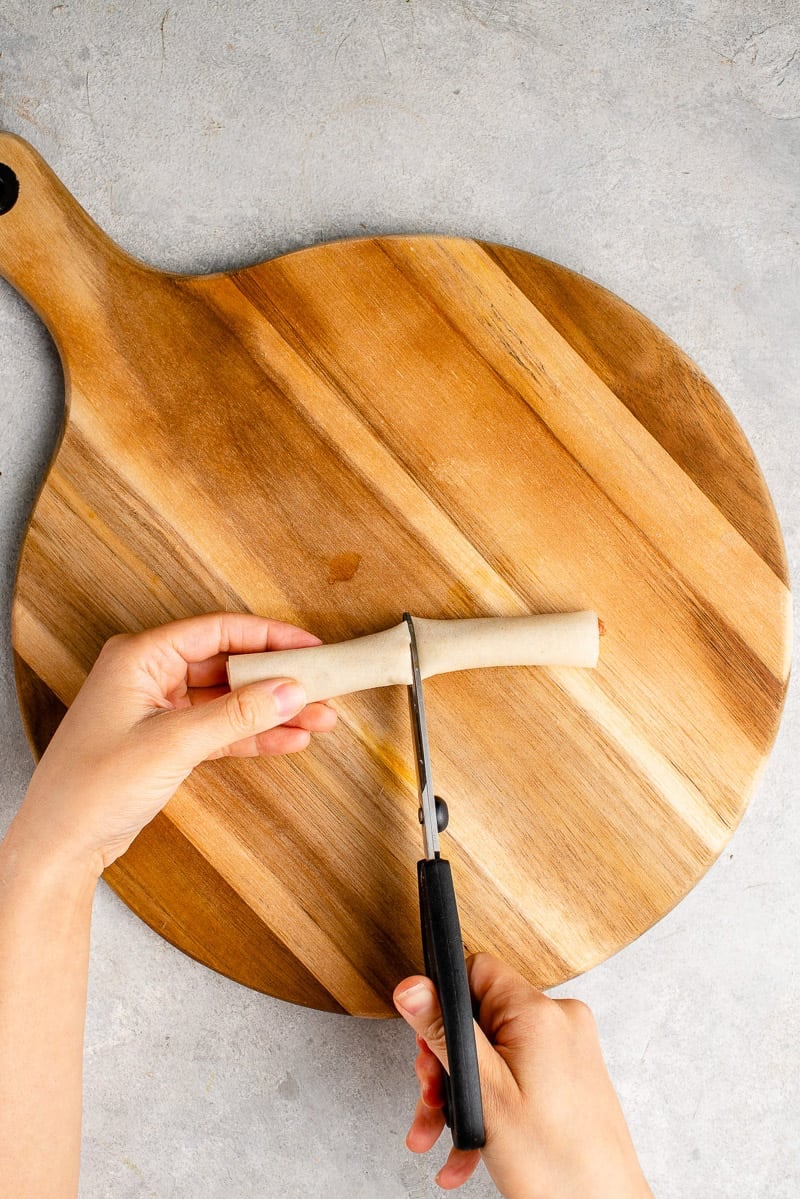
- Cut the Lumpiang Shanghai. Using kitchen shears or sharp scissors, cut the long roll into 2-3 pieces, depending on how big you want your vegan spring rolls. I cut mine into 2 to be about 2 ¾ inches long.
- Prep for frying. Line a large plate or platter with paper towels and set aside. This will be used to drain the oil once the vegan spring rolls are fried.
- Test the oil. Test the oil with one spring roll and see if it is hot enough. It should take about 4-5 minutes to become golden brown. If it is a lot faster, the oil is too hot. If it is slower, the oil is not hot enough.
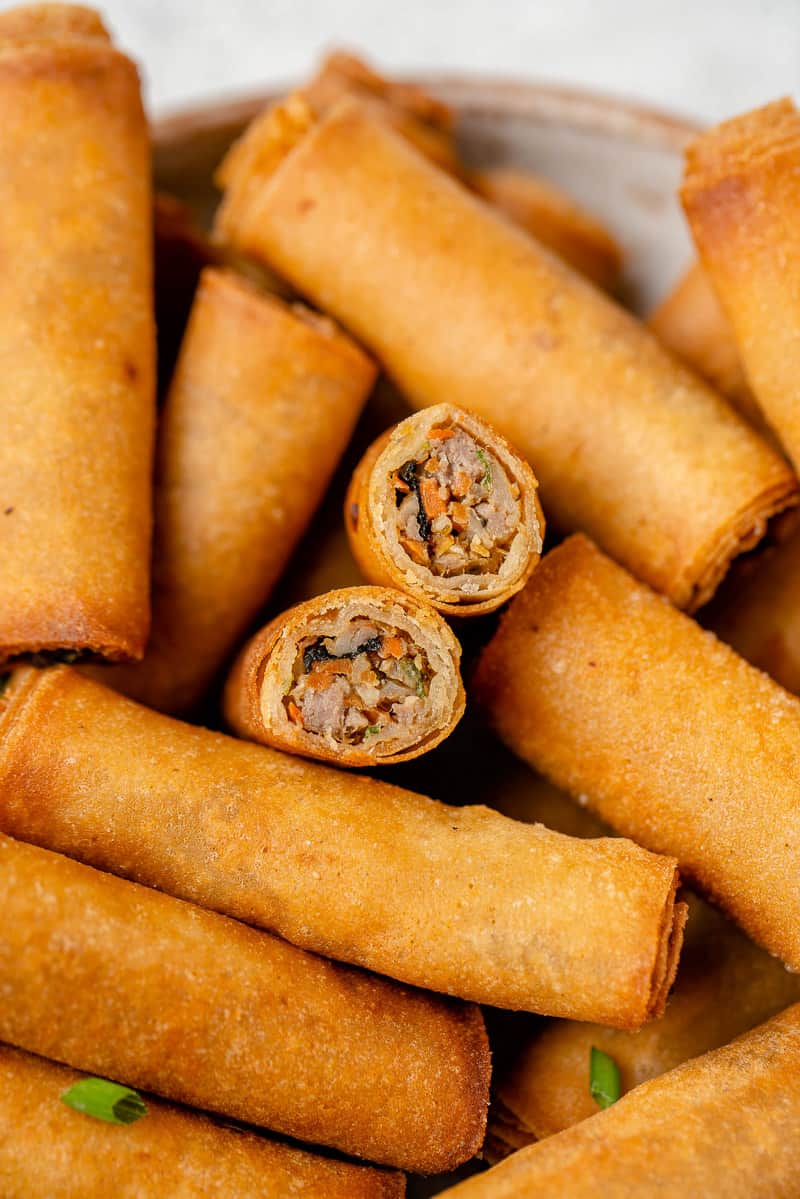
- Fry the remaining lumpia. Once the oil is at an optimal temperature, add about 5-8 lumpia to the oil (depending on the size of your pot) and fry the Lumpiang Shanghai for 4-5 minutes or until golden brown. Place the lumpia on the paper towel-lined plate to drain off the excess oil.
- Serve these vegan spring rolls immediately with a dipping sauce of your choice. Enjoy!
Variations
- Air Fryer option: If you’re uncomfortable deep frying at home, you can air fry these vegan spring rolls from fresh or frozen. Both work well and there is no need to precook the filling. To do so, coat the outside of the lumpia with a thin layer of cooking oil and place them in a single layer in the air fryer basket. Air fry at 360 degrees Fahrenheit for 14 minutes, flipping halfway through.
- Gluten-free option: If you are gluten-intolerant, you can use rice paper instead of lumpia wrappers – similar to making Vietnamese Spring Rolls. If you’ve never fried with rice paper before, refer to this tutorial for making Vietnamese Fried Spring Rolls that Won’t Explode When You Cook Them! Note that her recipe is NOT vegan, but the technique is helpful.
- Add celery: I have seen some recipes with added celery. I left it out in my version because my family doesn’t add that, but if you want to use celery, I would add 1 large or 2 small ribs.
- Use wonton wrappers: We use lumpia wrappers that are found in the frozen section of our local asian market. Wonton wrappers will work BUT the vegan spring rolls will look bubbly on the outside.
- Use a cornstarch glue to seal the wrappers: If the spring roll wrappers are not sealing with just water, opt for a cornstarch glue instead. To make this, mix 2 tablespoons of cornstarch with 1⁄3 cup of water in a small saucepan. Bring to a boil over low heat, stirring often until thickened into a glue-like consistency. Allow it to cook until it is easy to handle, then use it as you would water to seal the lumpia wrappers shut.
Serving Suggestions
Authentic Lumpiang Shanghai is often served as a snack or appetizer with dipping sauces of choice. We love sweet and sour dipping sauce, banana ketchup, or garlic and vinegar dipping sauce.
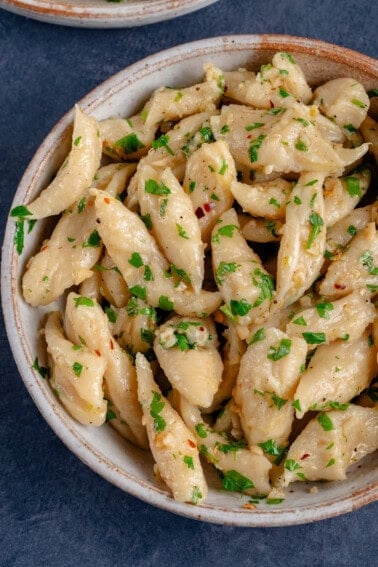
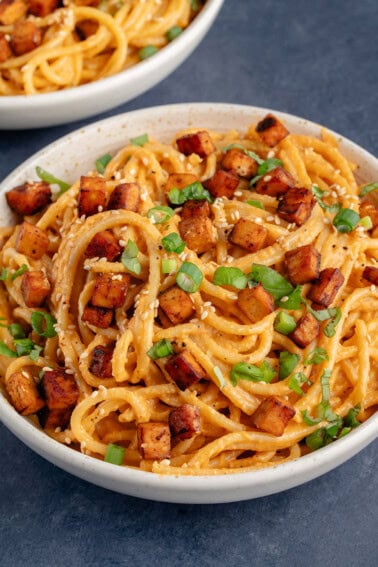
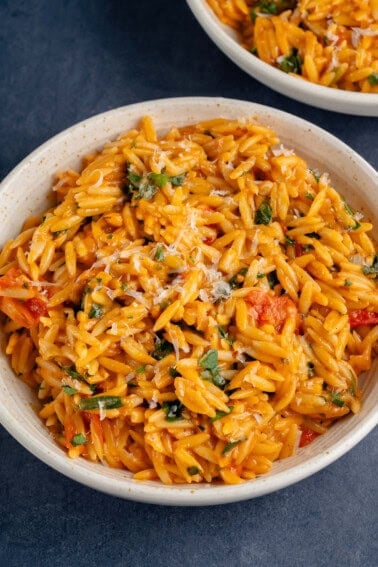
You may also enjoy vegan spring rolls served with another one of our other Filipino Recipes, such as Crispy Tofu Sigsig, Vegan Filipino Garlic Fried Rice or Vegan Filipino Pancit Bihon. Finish off the meal with Creamy Ube Pie or Avocado with Condensed Milk.
Storage Instructions
Once fried, these vegan spring rolls are best served immediately. If you’d like to make them in advance, keep the lumpia covered in a single layer in the refrigerator with a damp paper towel over top until ready to fry (best if planning to fry the same day). If you are prepping more than one day in advance, it is best to freeze for future use.
To do so, place all of the lumpia on a baking sheet and stick the baking sheet in the freezer until the spring rolls are frozen a few hours. Once frozen, transfer the spring rolls into an airtight container or bag and place in the freezer for up to 3 months.
If frozen, these vegan spring rolls can be deep-fried or air fried from frozen until hot and crispy.
More Vegan Filipino Recipes You May Enjoy:
- Champorado (Tsampurado)
- Turon (Banana Lumpia)
- Filipino Coconut Milk Adobo
- Vegan Tortang Talong (Filipino Eggplant Omelette)
- Vegan Sinigang (Filipino Tamarind Soup)
- Boiled Peanuts (Nilagang Mani)
Make sure you tag us on Instagram @sweetsimplevegan and @consciouschris and hashtag #sweetsimplevegan if you recreate any of our recipes, we love to see your photos!
Print
Vegan Filipino Spring Rolls Recipe (Lumpiang Shanghai)
- Total Time: 1 hour 30 minutes
- Yield: About 50 lumpia 1x
- Diet: Vegan
Description
Learn how to make Vegan Filipino Spring Rolls aka Lumpiang Shanghai at home! These fried lumpia have the same taste and texture as the authentic recipe I grew up with, but are made with 10 simple plant-based ingredients. Deep fry or air fry until golden brown and crispy and serve with your favorite dipping sauces.
Ingredients
- 2 flax eggs (2 tablespoons flaxseed meal + 6 tablespoons water)
- 1 (8 oz) can water chestnuts, drained
- 1/2 cup green onions, roughly chopped
- 1 large carrot, roughly chopped
- 1 sheet of nori, torn into small pieces
- 4 cloves fresh garlic
- 1 pack (3/4 lb.) Impossible Foods plant-based ground beef* (see notes)
- 1 tablespoon soy sauce (or tamari)
- 1/4 teaspoon salt
- 1/4 teaspoon pepper
- Lumpia or spring roll wrappers * (ours were 5 1/2-inch squares; see notes)
- Oil, for frying
- Serve with dipping sauces of choice, such as sweet and sour, banana ketchup or garlic and vinegar
Instructions
- If your wrappers are frozen, thaw them according to the package directions, or the night before.
- Prepare the flax egg by mixing together the flaxseed meal and water in a small bowl and setting it aside for 15 minutes to thicken.
- In the bowl of a large food processor, add in the water chestnuts, green onions, carrot, nori and fresh garlic. Process until everything is very finely chopped and uniform in consistency.
- Transfer this mixture to a large bowl along with the vegan ground beef, soy sauce, salt and pepper, along with the prepared flax egg. Mix everything well until evenly combined. Set aside.
- Prepare your frying oil. Fill your pot with 2-3 inches of oil and heat it to to 350 degrees. If you don’t have a thermometer, set it over medium-low heat (between 3-4) to start. I like to start the heat low and adjust it later because if it is too hot, it will take a long time to cool down to the correct temperature.
- Fill a small cup with water and keep it handy for later. Carefully peel one sheet of wrapper off of the pile and place it straight down (in a square no a diamond) onto a clean work surface. Place 1 1/2 tablespoons of filling towards the bottom of the wrapper (about 1/2 inch from the bottom) and spread it out into a long line (see photos in post). If you have any excess on your fingers you can just wipe it on the inside of the wrapper so you don’t waste it.
- Fold the bottom over the filling and tightly tuck it under. Roll the lumpia tightly into a long cigar shape. Dip your fingers into the cup of water and then use that to wet the ends of the wrapper. Roll the lumpia over the end and make sure it sticks. If it does not, you can add more water but if it still does not stick, you may need a cornstarch “glue” which I will put in the notes. Using kitchen sheers or sharp scissors, cut the long roll into 2-3 pieces, depending on how big you want your lumpia. I cut mine into 2 to be about 2 3/4 inches long.
- Line a large plate or platter with paper towels and set side. This will be used to drain the oil when the lumpia are fried.
- Test the oil with one lumpia to see if it is hot enough. It should take about 4-5 minutes to become golden brown. If it is a lot faster, then it is too hot. If it is a lot slower, then it is too low.
- Once the oil is at optimal heat, working in batches, add about 5-8 lumpia to the oil (depending on the size of your pot) and fry the lumpia for 4-5 minutes, or until golden brown. If you are cooking them from frozen, it may take a minute or two longer. Place the lumpia on the paper towel lined plate to drain off excess oil.
- Serve immediately with dipping sauce of choice. Enjoy!
Notes
- Air fryer instructions: You can air fry these from fresh or frozen, both work and there is no need to precook the filling! Coat the outside of the lumpia with a thin layer of cooking oil and place it in a single layer in the air fryer. Air fry at 360°F for 14 minutes, flipping halfway through. Cool before serving to allow it to crisp up and enjoy!
- I have tested this recipe with beyond meat and although the recipe did work, it had an overpowering “beyond meat taste” that took away from the recipe, in my opinion.
- If your food processor is small, you will need to process the vegetables in batches. I suggest doing a mix of everything in each batch. By this, I mean some water chestnuts, green onions, garlic, carrots and nori in each batch. I find that the moisture of the water chestnuts really brings everything together and this will also guarantee that everything is of a similar consistency.
- Instead of or even along with green onions, white or yellow onions also work well in this recipe.
- If the spring roll wrapper does not stick with just water, you can opt to make a cornstarch glue instead. To make this, mix 2 tablespoons cornstarch with 1/3 cup water in a small saucepan, bring to a boil over low heat, and stir often until thickened into a glue-like consistency. Allow it to cook until it is easy to handle so that you do not burn your fingertips.
- I have seen some recipes also add celery which would be tasty! I left it out just because my family doesn’t add that but if you want to use celery, I would add 1 large or 2 small ribs.
- The lumpia wrappers that we use are found in the frozen section of our local asian market. We like to use the wrappers that say “extra crispy” on the package. Wonton wrappers will work BUT the lumpia will look bubbly on the outside.
- To make these gluten-free, you can opt to use rice paper instead of lumpia wrappers, just as you would in Vietnamese Spring Rolls. Refer to this youtube video for tips on how to prevent them from splattering and to ensure that you have the best possible results when frying with rice paper. Her recipe is NOT is a vegan recipe, but I am sharing it for the sake of the technique she used to wrap and fry her rolls.
- You can keep the lumpia covered in a single layer in the refrigerator with a damp paper towel over top until ready to fry (if you are preparing it the same day) or you can freeze for future use. To freeze it, place all of the lumpia a baking sheet and place that into the freezer until frozen. Once frozen, transfer the lumpia into an air tight container or bag and place back into the freezer until ready to use.
- Prep Time: 1 hour
- Cook Time: 30 minutes
- Category: Appetizer, Snack
- Cuisine: Filipino

Reference Claire’s response below, I am said boyfriend and we are still making this recipe over a year later. They’re a hit at all the parties and is now requested for us to bring annually. Love it!
I can’t wait to make these for a friends pot luck. Quick question. Do you cook the filling before assembling if these are traditionally fried? It looks like I don’t need to cook the filling if I air fried them?
Thanks!
No need to cook the filling! It will cool through fully as you fry or air-fry!
these turned out yummy and the recipe was very simple to follow. made them in advance and froze for a christmas appetizer.
I made these for my boyfriend, who is Filipino, and he said they were even better than the ones he had growing up! His family loved them too. We have made them 4 times already. Sooo good, Jasmine!
Delicious!
Thank you for the recipe Jasmine! I made these today and they were yummy. My first time ever making lumpia. My impossible meat mixture oozed out the ends for some of the pieces. Do you have any tips to prevent that?
Hey Rosie,
So glad you enjoyed the recipe. We would recommend filling them a little bit less and leaving some room on the ends. Hope this helps 🙂
Oh Rosie, just gobble it up more quickly!
What would you use next time in place of the Beyond Meat crumble?
We like to use Impossible meat for this recipe 🙂
Jasmine, you nailed it with this recipe!! I’m half Filipino and haven’t had lumpia since becoming a vegetarian a few years ago. This brought back all the nostalgia of classic lumpia from my childhood. I followed the recipe pretty much exactly, only left out the nori. I’ll definitely be making this again for future family gatherings, or whenever I have some free time on my hands. 🙂 Thank you for putting together such an authentic and great tasting recipe!
I made these with my boyfriend who is Filipino and he said he felt like he was eating dinner at home lol. Thanks for the great recipe, delicious 🙂
I made these and cooked them for 8 mins in my air fryer and they came out wonderful! Everyone ate them up really quick!
I plant o make these in my air-fryer as well. Did you cook the mixture first?
We haven’t tested it ourselves, but we know people who have and you do not need to cook the mixture first when air-frying!
When I saw that you posted this recipe, I knew I immediately had to make this! I did, and wow! It impressed my filiphino omni fiance. Your filiphino recipes hit the spot.