This post may contain affiliate links. Please read our disclosure policy.
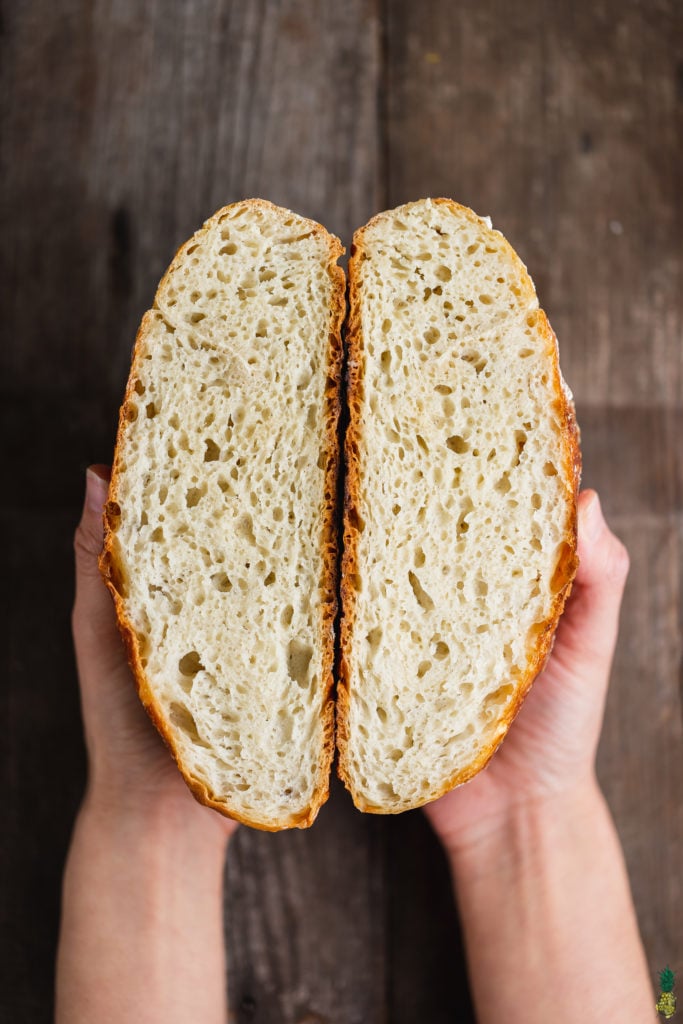
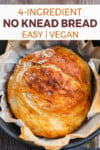
There’s nothing better than fresh baked bread, especially when it requires just 4-ingredients, no kneading and no starter. Learn how to make this easy artisan bread at home in no time!
Baking a fresh loaf of bread has become part of our weekly routine recently. Every weekend we make it a priority to bake a loaf for the week ahead. It’s super simple to make, budget-friendly, and tastes so much better than store-bought bread. The only problem is that we eat it so fast that we probably should make two or three loaves instead.
Using just 4 simple ingredients — flour, water, yeast, and salt — you can make this no-knead bread with ease.
Now the question is, what do we do with our fresh loaf of no-knead bread? The first, and most obvious, answer is to eat the whole dang things fresh out of the oven ????. You can also slice it for toast, sandwiches, to serve with soup, etc.
We love to take our no-knead bread to the next level by adding ingredients like pimento stuffed green olives, fresh garlic, and herbs like rosemary, and thyme. This gives the bread a beautiful and unique flavor. Feel free to get creative and add ingredients you love.
If you need some ideas for recipes you can you pair this no-knead bread with, here a few of our favorites:

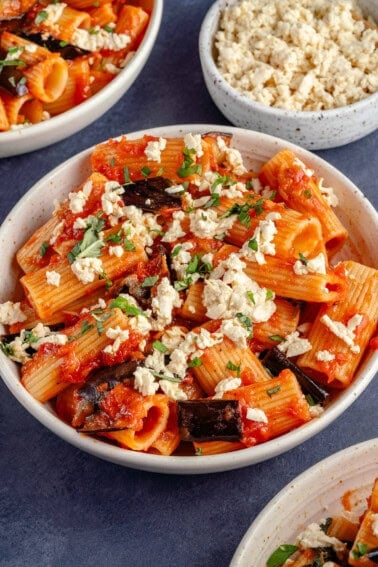
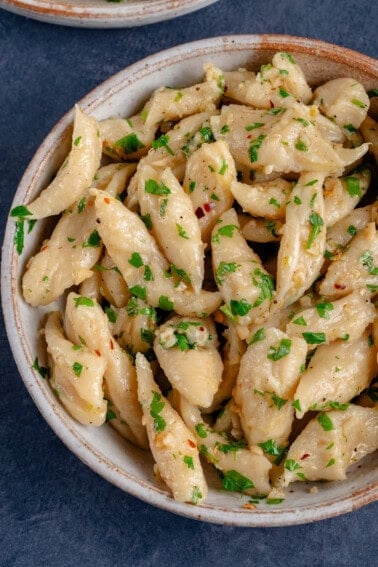
- Vegan Broccoli Rabe & Sausage Pasta
- Easy Vegan Cheese Fondue (Ready in 10-Minutes)
- One-Pot Vegetable Noodle Soup
- Instant-Pot Pasta Fagioli
- Homemade TTLA Sandwich
Make sure you tag us on Instagram @sweetsimplevegan and @consciouschris and hashtag #sweetsimplevegan if you recreate any of our recipes, we love to see your photos!
Print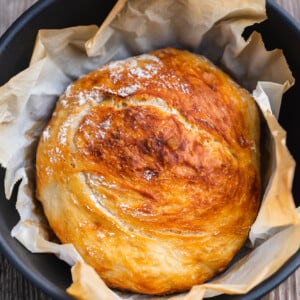
4-Ingredient No Knead Bread
- Total Time: 14 hours 45 minutes
- Yield: 1 loaf 1x
Description
There’s nothing better than fresh baked bread, especially when it requires just 4-ingredients, no kneading and no starter. Learn how to make this easy artisan bread at home in no time!
Ingredients
- 440g all purpose flour + more for dusting
- 1/4 teaspoon active dry yeast
- 1 1/2 tsp (8g) salt
- 345g room temperature water
Equipment
- 6 Quart Dutch Oven (we like the Cravings by Chrissy Teigan Dutch Oven or the Le Creuset Dutch Oven)
- Large bowl
- Bench scraper
- Oil
- Plastic Wrap
- Kitchen Towel
Instructions
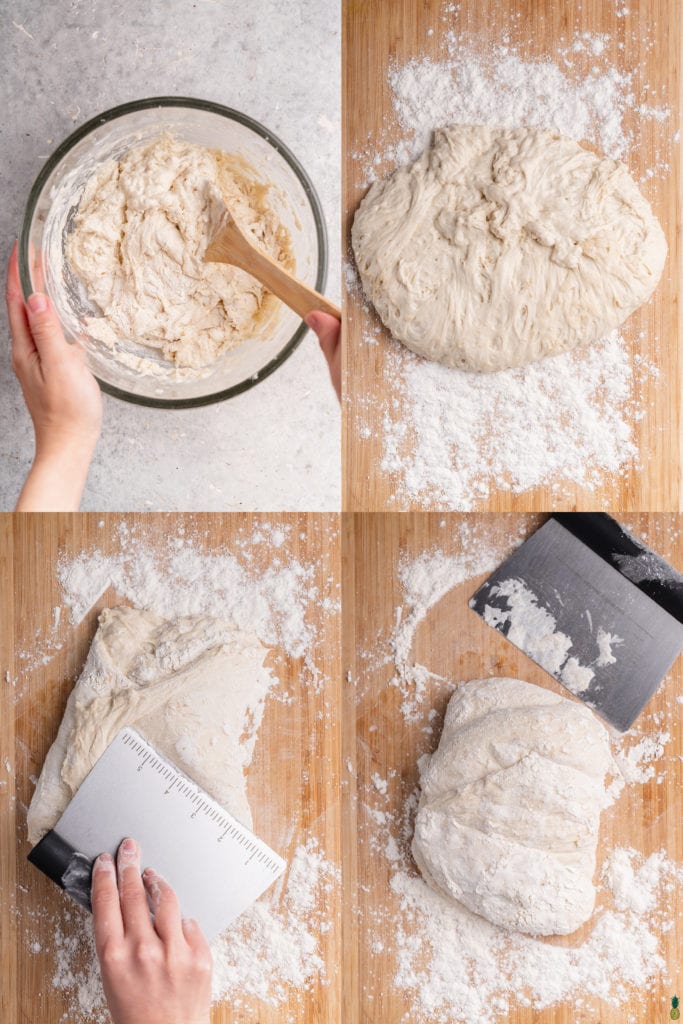
- In a large bowl combine the flour, yeast and salt until uniform. Form a well in the middle and add in the water. Stir until well incorporated and a shaggy dough forms. Cover the bowl with plastic wrap or a clean damp kitchen towel and allow it to rest for 12-18 hours at warm room temperature, or about 70 degrees. You’ll know it’s ready when it has expanded and has bubbles all over the surface.
- Generously flour a work surface and pour the dough out onto it. Sprinkle the top of the dough with flour and fold it into itself 2-3 times using a bench scraper or clean hands. Cover loosely with plastic wrap and let rest about 15 minutes.
- Lightly grease the inside of a large bowl. Using a small amount of flour (enough to keep dough from sticking to work surface or to your hands), shape dough into a ball. Place the bread into the greased bowl and cover with a damp towel. Allow it to rise in a warm area for about 2 hours. A great place to do this is in an oven with the light on.
- 30 minutes before the 2 hour mark, remove the dough from your oven if it is in there and preheat your oven to 450F. Place a 6 quart dutch oven (or heavy covered pot) inside. Allow it to warmup in the oven for at least 30 minutes. If you do not have a dutch oven, refer to the notes for tips on how to make this without one.
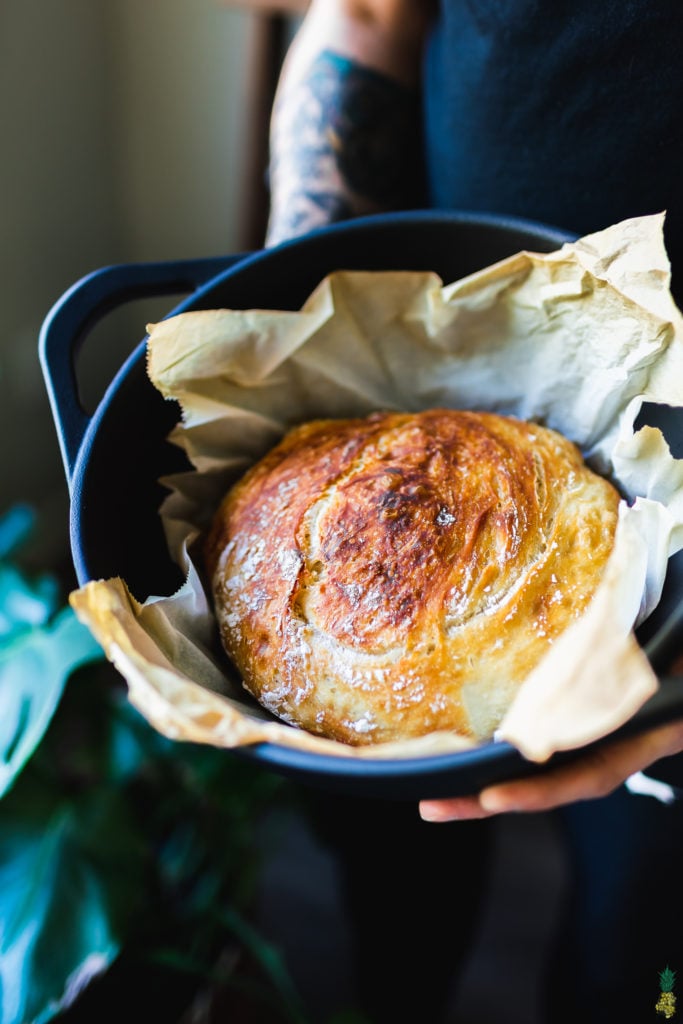
- Once the dough has risen, remove the dutch oven from the oven. Carefully transfer the dough into the dutch oven. If the dough does not slide out easily, you can remove it with your hands and quickly form it into a ball. Give the dough a quick spritz of water, cover it and place it into the oven to bake for 30 minutes.
- Remove the lid from the dutch oven and allow it to bake for 8-15 minutes more, or until golden brown.
- Remove the Dutch oven from the oven and CAREFULLY pick up the bread and transfer it onto a wire rack. Allow it to cool completely. Slice and enjoy!
Notes
- This recipe was inspired by Jim Lahey.
- If you want enhance the flavor of your no-knead bread, you can add ingredients such as olives, garlic, and fresh herbs (we like rosemary) while mixing your dough in step one.
- It is possible to make this bread without a dutch oven, although that method is preferred. You can take a look at this blog post for all of the details, but here are our recommendations:
- You can use a cast iron skillet (10″) or a baking stone for this bread. Add them into the oven to heat for 30 minutes just as you did with the dutch oven (step 4) as well as an additional cast iron skillet OR a baking sheet on the bottom rack. Bring water to a boil in a kettle (or a pot, but a kettle is preferred for easy pouring) and have it ready before you add in the dough. Once the dough has risen, spritz the dough with water and carefully place it into the cast iron skillet or on the baking stone. Working quickly (but carefully) add the boiling water to the cast iron skillet/baking sheet on the bottom rack. Wearing gloves here is recommended to prevent steam burns. If you can, we also suggest you spray the sides of the oven for additional steam. Close the oven and bake for 30-40 minutes, or until golden brown.
- We have also made this with 2 baking sheets with success. At step 3, you can either set the dough to rise on a lined baking sheet with a damp cloth on top of it OR in a bowl with a damp cloth like the recipe calls for. The bowl will help the bread keep its shape better as it will spread out a bit on the pan, but either work! Rise the dough just the same as the recipe above, for 2 hours with a damp cloth on top of it. Preheat the oven to 450F about 30 minutes before the 2 hour mark with a baking sheet on the bottom rack. Bring water to a boil in a kettle (or a pot, but a kettle is preferred for easy pouring) and have it ready before you add in the dough. Once the dough has risen, remove the cloth, spritz the dough with water and carefully place the baking sheet with the oven. Working quickly (but carefully) add the boiling water to the baking sheet on the bottom rack. Wearing gloves here is recommended to prevent steam burns. If you can, we also suggest you spray the sides of the oven for additional steam. Close the oven and bake for 30-40 minutes, or until golden brown. so that it is ready to go when the dough has proofed.
- A deep oven proof skillet may work in place of the dutch oven, just be sure it is safe at high temperatures. If it has an oven safe lid without a hole, you should be able to use it like you would a dutch oven, otherwise you can either place a baking sheet on top of it to trap in steam and act like a lid OR just follow the steps in the above in the first two suggestions with the cast iron skillet/baking sheet. Be sure to remove the lid or baking sheet dafter 30 minutes of baking just like you would a Dutch oven lid.
- We have heard that can also use two cake pans to create a sort of dutch oven as well, placing the bread in one and then stacking the other one, upside down, on top of it to trap in steam.
- Keep in mind that the baking sheet on the bottom rack may likely warp, so we suggest using a dedicated one/one you don’t mine messing up.
- Prep Time: 14 hours
- Cook Time: 45 minutes
- Category: Baked Goods
- Method: Oven
- Cuisine: Vegan
Disclaimer: This page may contain affiliate links, which simply means that we earn a commission if you purchase through those links, but your price remains the same. Thank you for supporting Sweet Simple Vegan!


This bread is amazing, and easy. Can be easily baked once a week instead of buying bread. Pretty much hands off and delicious! I made it this time with whole wheat flour and just added a little more water. It turned out really good.
Does the size of the Dutch oven matter? I want to try this but I’m very nervous. Thanks!
Not necessarily, as long as the dough fits!
What step you you add green olives to this bread?
You can add the olives in when you mix together all of the ingredients before the first rise. Sorry, that wasn’t clear in the notes!
I made this bread last night/today and added olives, rosemary and garlic, as you did in your Youtube video, and it is amazing! By far the tastiest bread I have ever eaten so thank you for sharing the recipe with us.
I don’t have a dutch oven but just used a large metal pot with an oven proof lid; worked like a charm 🙂 Looking forward to trying other flavour combos in future. I was thinking about cheese and jalapeno but ‘ve never baked with vegan cheese before, not in this context anyway, do you think it would work?
This is going to be a problem!! It’s soooo good. And the recipe works every. single. time.
Can you freeze it?
Hi I have never made bread before and your video inspired me to give it a try. I was wondering what kind of yeast do you use?
We use active dry yeast!
Made this and it was awesome… but the parchment paper stuck to the bottom of the bread! Should I flour the parchment paper next time?
First time making it.soo good,ate1/3 of it with butter and honey..be making it again very soon.
I made this bread last week and it was wonderful! I don’t even own a dutch oven so I used a stainless steel stockpot with aluminum foil on top. It was less than ideal but it worked and I plan to do it again! I have some rising right now but this time I am using organic bread flour instead of all-purpose!!! Really looking forward to eating it tomorrow!
Worked wonderfully even though I don’t have a dutch oven! I used a ceramic pie pan and put a pan of water under and removed the water after 30 minutes and then let it bake for 8 minutes more.
Would it work to make it GF? If so, measurements/ ingredients? Thanks!
We have not tested this gluten free and we do not suggest using it 1:1 with the flour in this recipe. The best thing you can do is find a gluten-free specific recipe and use that instead to guarantee success!
What if the gluten free flour says on the package that it is a 1:1 ratio? I myself have looked for Gluten free recipes and it is super tough because they all use more than 1 flour and that kind hurts the pocket in regards to budget. I have been trying to figure out some kind of recipe that I can make with the 1 bag of GF flour 1:1 and it is not easy (especially ones that don’t have milk eggs or sugar, my husband has major allergies). 🙂
We have tried 1:1 flours before but we have found that they work best in cookies and bars vs. breads and rolls. Since there is no gluten, the recipe will not come out the same and we don’t know if the instructions for this recipe will be applicable. For guaranteed results and for less of a waste of ingredients, finding a gluten-free specific recipe would be best.
We loved your bread! Thank you so much for sharing…
I have found this easy GF bread, if you guys are interested…. The trick is the Xantham gum and tapioca starch (which luckily isn’t that pricey.)
Just note it doesn’t rise as much, so it is a heavier bread. Toasts really well!
https://pin.it/4Z7wDPb
omg guye I just tried this and it was soooo good. First time baking bread and I can’t believe how easy it was
This bread was SO GOOD. I am going to start making this once a week instead of buying bread. If you don’t have a Dutch oven (like me) you can use a cast-iron skillet and put a tray of water underneath to create steam and then take the water out when you are supposed to remove the lid in the recipe.
Would this work In some other type of dish if I don’t have a Dutch oven?
Some people have used to cake pans and it has worked well! 🙂