This post may contain affiliate links. Please read our disclosure policy.
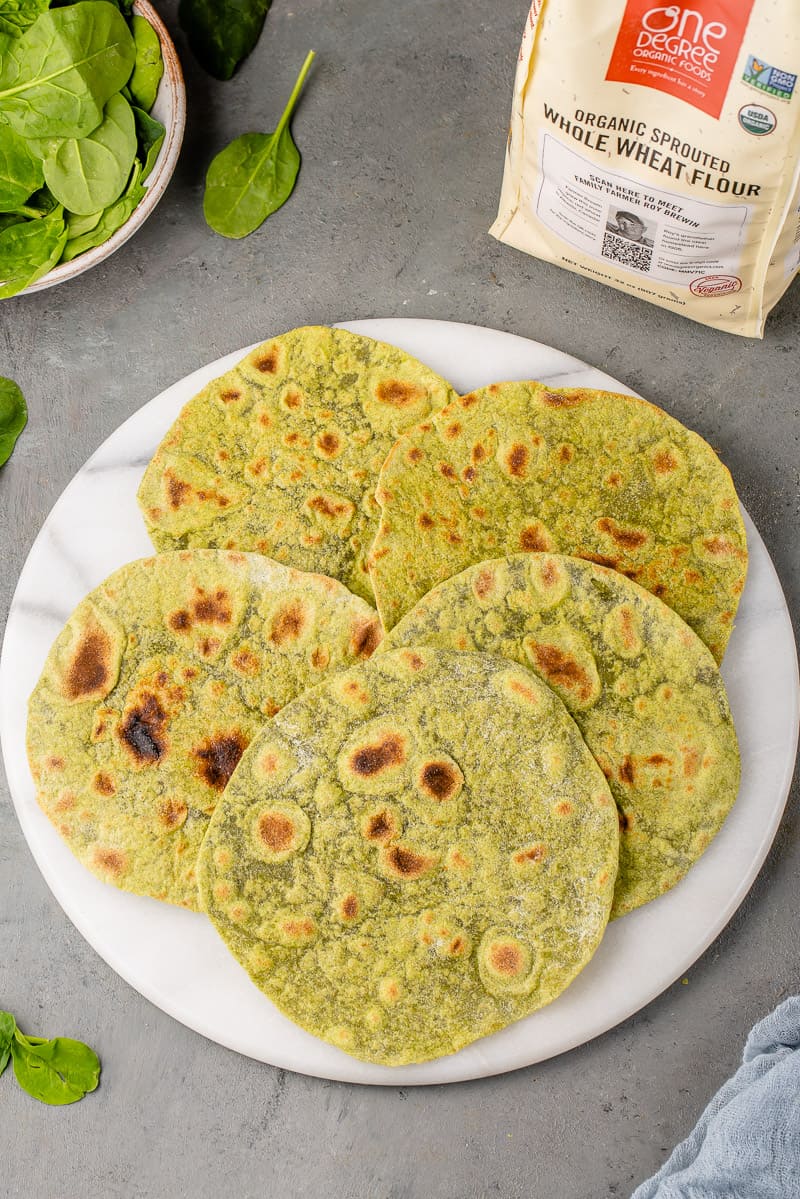
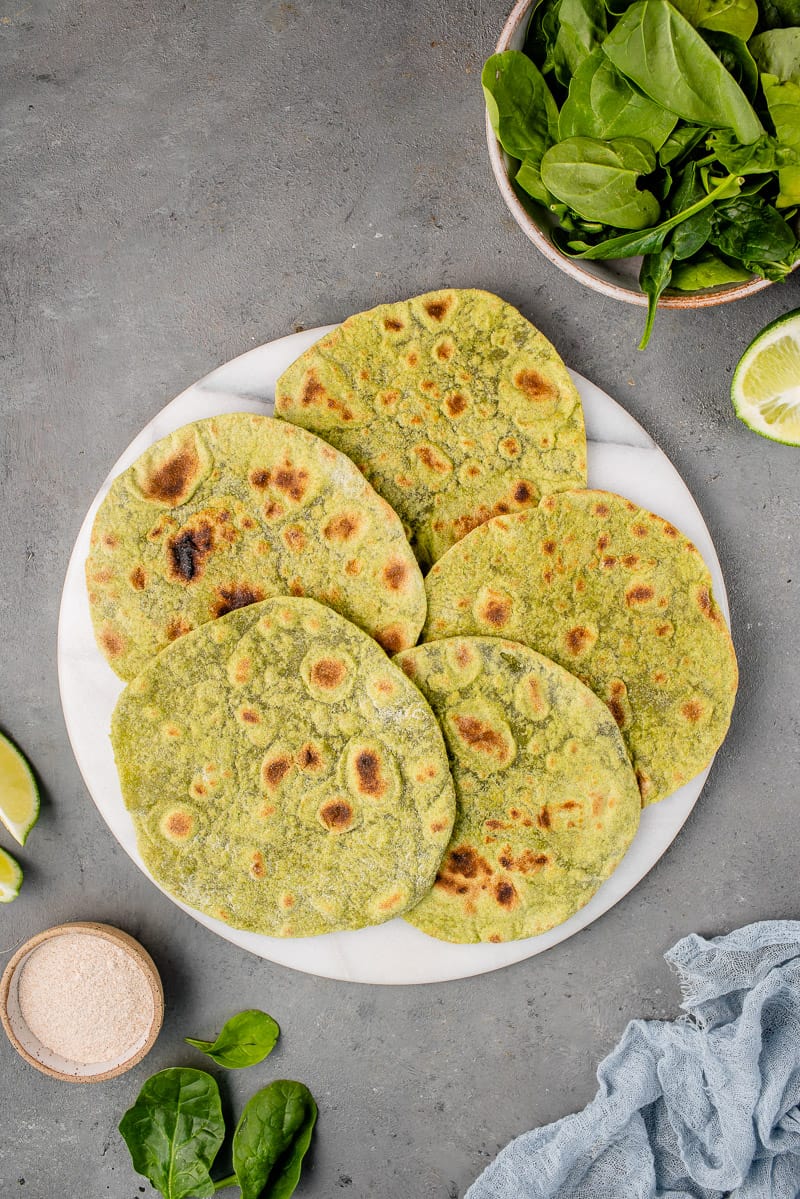
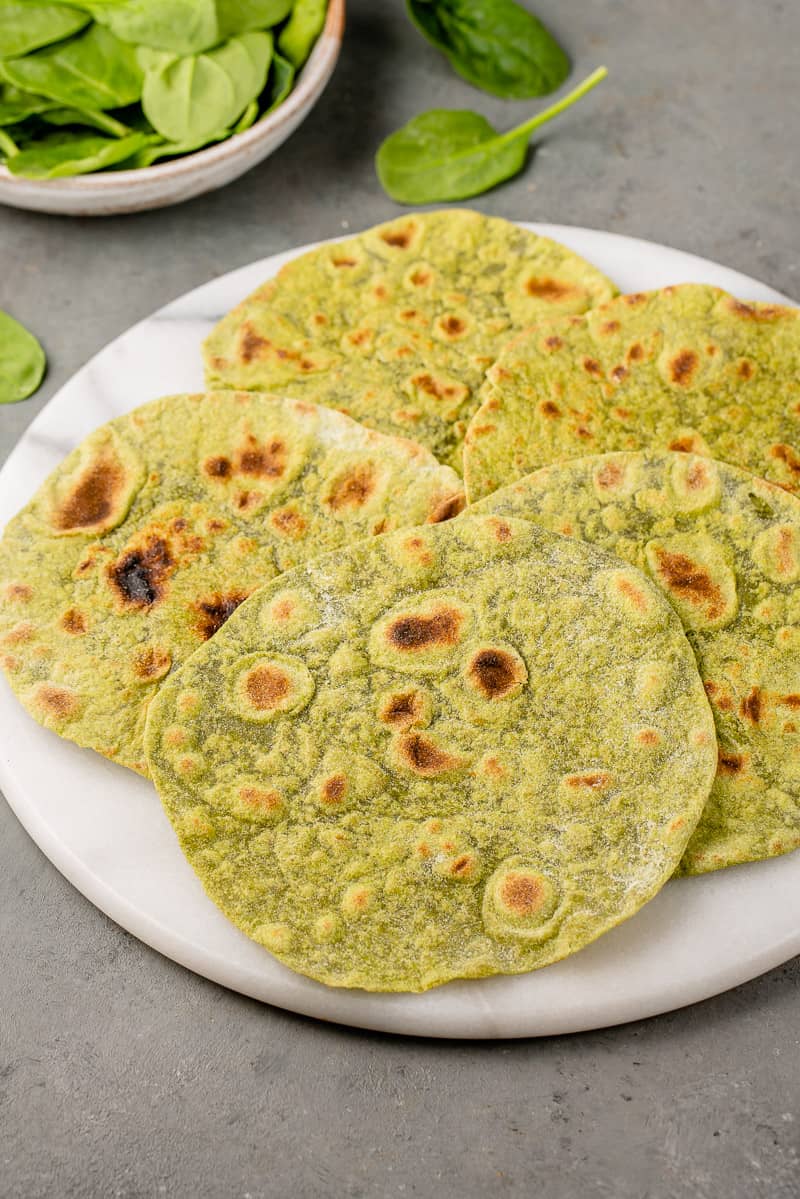
These spinach tortillas require just 6 simple ingredients and they are fairly easy to make! You can make them small or large depending on how you want to serve them, and they are SO good!!
This post is sponsored by One Degree Organics.
If there is anything that I learned from the process of making this recipe it’s that tortillas are SERIOUS BUSINESS! I have so much more appreciation and understanding of the *art* of tortillas and I am excited to make more in the future. I also want to give a disclaimer that it may take a few trials and some practice to get your tortillas to be perfect but once you do, it is magic!
The spinach tortillas that I am preparing today are not traditional, but I still want to share some info on the history of tortillas as it is what I am adapting this recipe from today.
Tortillas are thin, unleavened flatbreads that are a staple in Mexican and Central American cuisines. They are typically made from either corn maize or wheat flour. Tortillas date all the way back to 10,000 BCE and were made of native maize with dried kerne, and were the principal food of the Aztecs and other Mesoamerican civilizations. Flour tortillas originated in the northern Mexican states of Chihuahua, Durango, Sonora and Sinaloa, as those territories are more suited to growing wheat than corn. Also, the name Tortilla is derived from the Spanish word torta, which means cake, plus the diminutive -illa, literally meaning “little cake”.
Also, fun fact: tortillas are now the #2 packaged bread products in the US, second only to sliced bread, and have surpassed both bagels and muffins in their popularity.
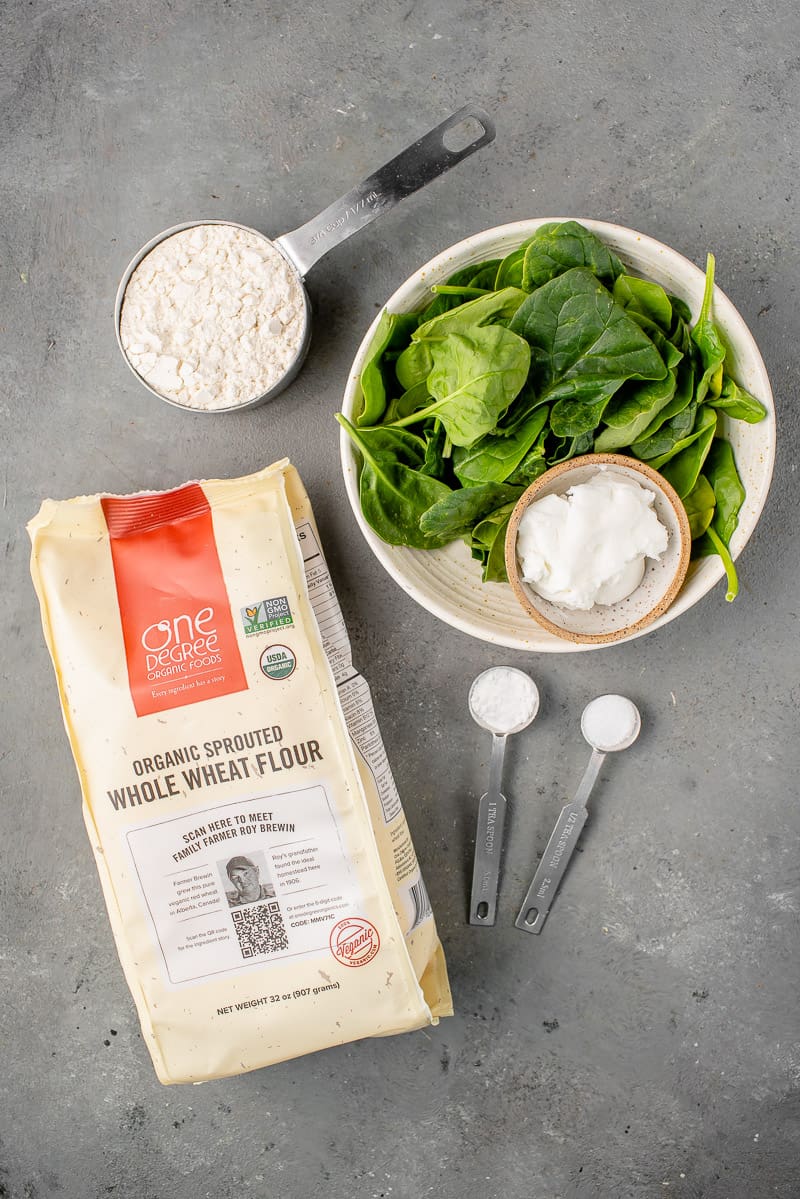
For this recipe you will need:
- One Degree Organics Sprouted Whole Wheat Flour: This flour is great for so many different recipes, including breads, cookies, and tortillas too! We wanted to incorporate this heart healthy grain into the recipe because this sprouted ingredient has a higher boost of key vitamins and minerals, and also aids in digestion!
- All Purpose Flour: We have tried this recipe with both 50/50 all purpose to whole wheat flour and 100% whole wheat, and the 50/50 blend yielded the most desirable outcome. Although the 100% worked, it was not as soft and pliable, and to us not as enjoyable as the 50/50 blend.
- Salt: The best part about making tortillas at home is that you can salt them to your liking. Remember that the salt is really what is going to help bring flavor into these tortillas. We don’t recommend skimping on the ¾ teaspoon in the recipe BUT if you want them saltier, feel free to add more!
- Vegetable shortening: Instead of using lard in this recipe, we are using vegetable shortening. It is a vegan alternative and worked really well!
- Baking powder: This helps the tortilla to be light and fluffy!
- Fresh Spinach: Fresh is best here! It was hard for us to get an equivalent with frozen spinach, so we say stick to fresh to make this recipe as accurate as possible.
- Water: You will need water for both cooking the spinach and hydrating the dough– just be sure to pay attention to the instructions below to prevent any issues.
Shoutout Claudia Reglado for help with this recipe. She has a detailed tutorial on her youtube channel here that really helped me perfect these.
A few tips before getting started:
- We made small tortillas, but you can divide the dough into 6 or 8 pieces instead of 12 and roll them out accordingly if you would like larger ones.
- If the tortillas are springing back and not holding their shape as you roll them out, then let the dough (or dough balls) rest for 15-20 minutes longer.
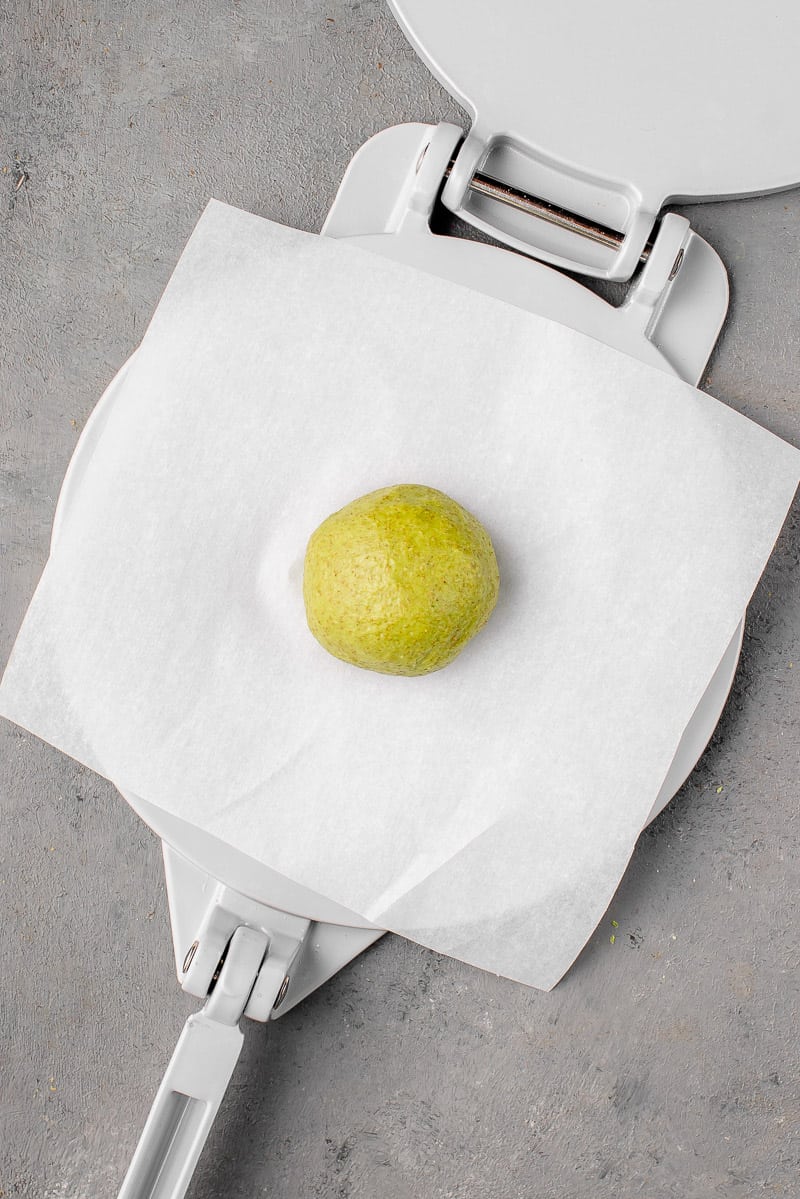
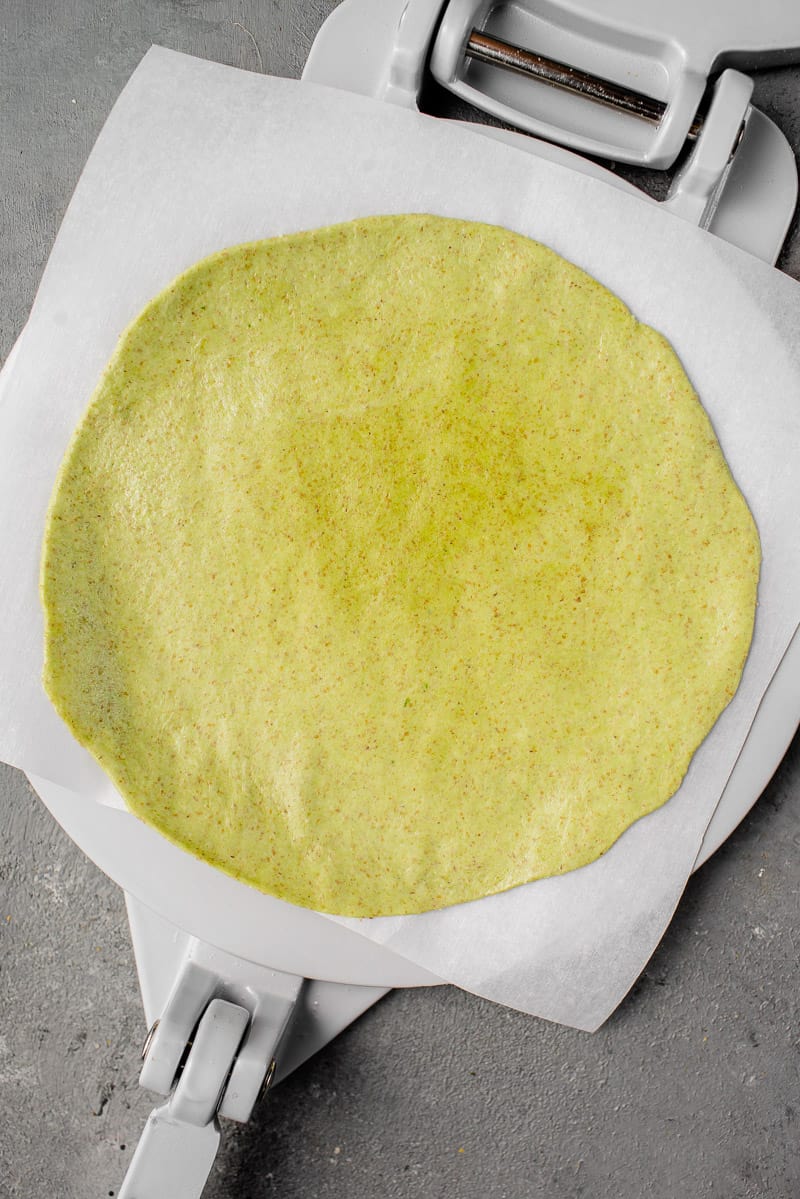
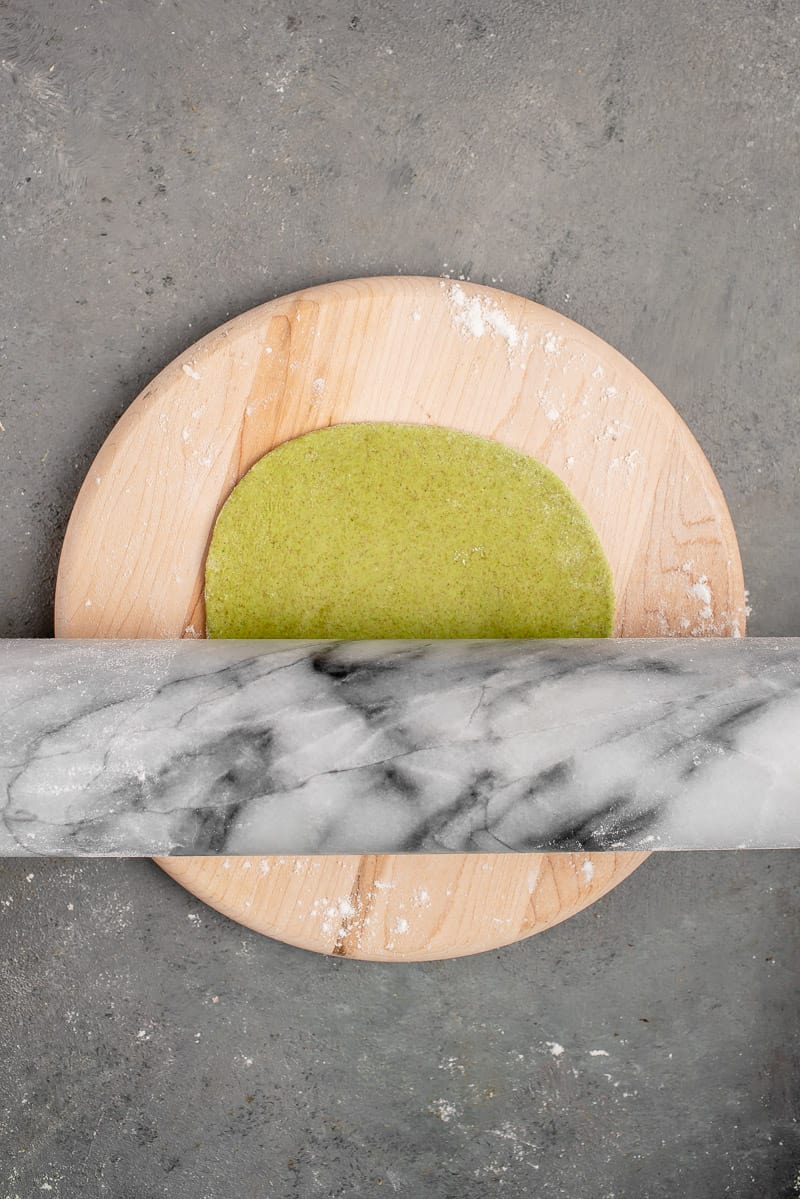
- You can either roll them by hand or with a tortilla press, both pictured above. We have found the best results rolling them manually.
- It can take a few tries to get the heat right! The first tortilla is usually a tester. If you’re getting black spots very fast on your tortillas, then your temp is probably too high. On the other hand, if it’s taking too long for it to get brown spots, then your temp is too low.
Be sure to check out One Degree Organics and their amazing products, which always use organic ingredients that are sourced from farmers who use sustainable, plant-based farming methods!
If you like these spinach tortillas, you might also enjoy:
- 5-Ingredient Gluten-Free Flatbread
- Fluffy Vegan Egg Bread (No Bread Maker Needed)
- Easy Vegan Tortilla Soup (Gluten-free + 30 Minutes)
- Potato & Bean Quesadillas (5-Ingredients)
- Homemade Tortilla Chips (No Oil Added)
Make sure you tag us on Instagram @sweetsimplevegan and@onedegreeorganics and hashtag #sweetsimplevegan if you make these spinach tortillas, we’d love to see your photos!
Print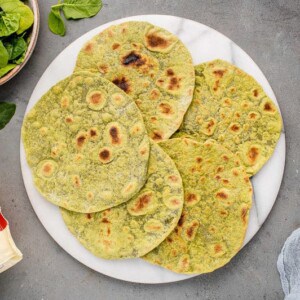
Whole Wheat Spinach Tortillas
- Total Time: 1 hour 10 minutes
- Yield: 12 6-inch tortillas
- Diet: Vegan
Description
Learn how to make spinach tortillas at home with just 6 simple ingredients. You can make them small or large depending on how you want to serve them, and they are SO good!!
Ingredients
- 3/4 cup (115g) One Degree Organics Sprouted Whole Wheat Flour
- 3/4 cup (102g) all purpose flour
- 3/4 teaspoon (4g) salt
- ¼ cup (48g) vegetable shortening
- ¾ teaspoon (4g) baking powder
- 2 cups (about 50g) spinach, lightly packed
- 3/4 cup water, divided
Equipment
- Small pan
- Griddle or comal
- Scale or measuring spoons
- Medium bowl
- Plastic wrap or clean kitchen towel
- Tortilla press or rolling pin
Instructions
- In a small pan over medium-low heat, add in ¼ cup of room temperature water along with the spinach. Place a lid on the pan and allow it to heat up for 3 minutes, or until the spinach is wilted. Remove from heat but keep the lid on.
- Add the shortening to a medium-sized microwave-safe bowl and microwave until melted (about 1 minute). Set aside.
- Heat the remaining ½ cup of water. We did this in the microwave to speed things up.
- Remove the spinach from the pan, squeezing it against the side to remove any excess water, and transfer it into a high speed blender along with the ½ cup of hot water. Blend until smooth.
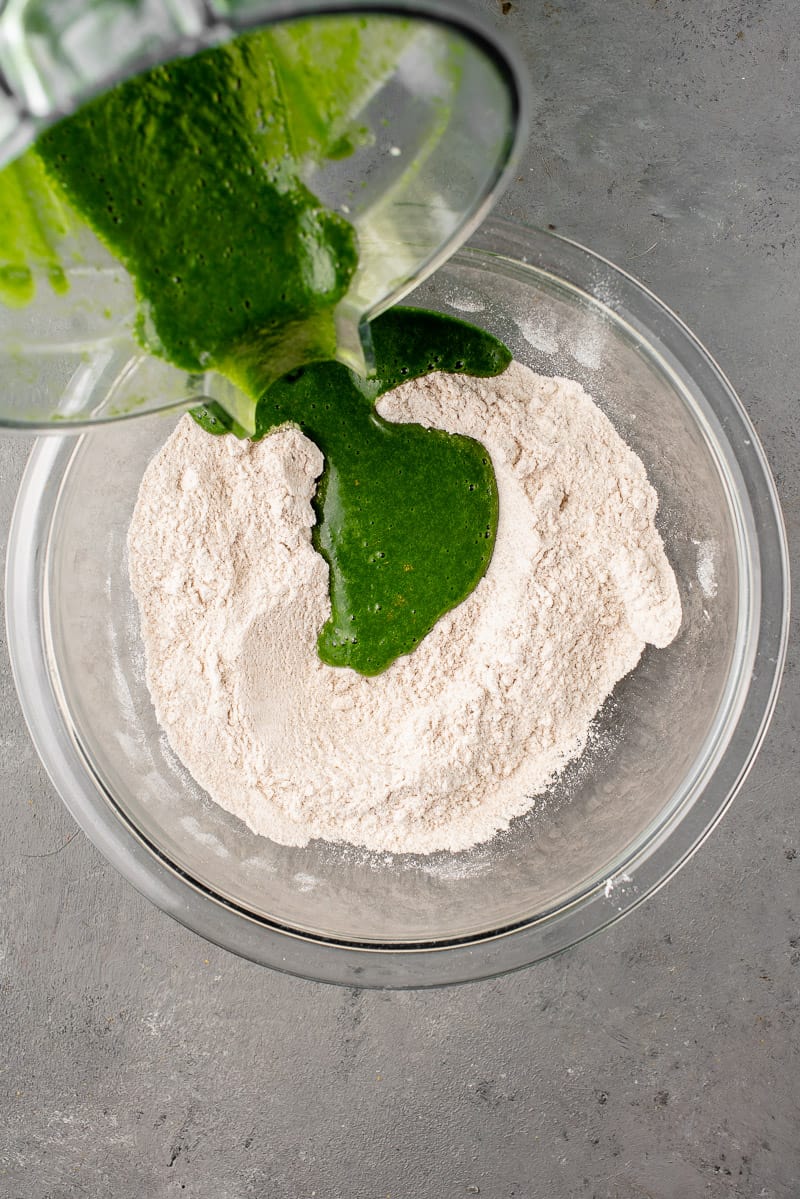
- To the bowl with the shortening, add all of the blended mixture and mix until smooth. Add in the salt and baking powder.
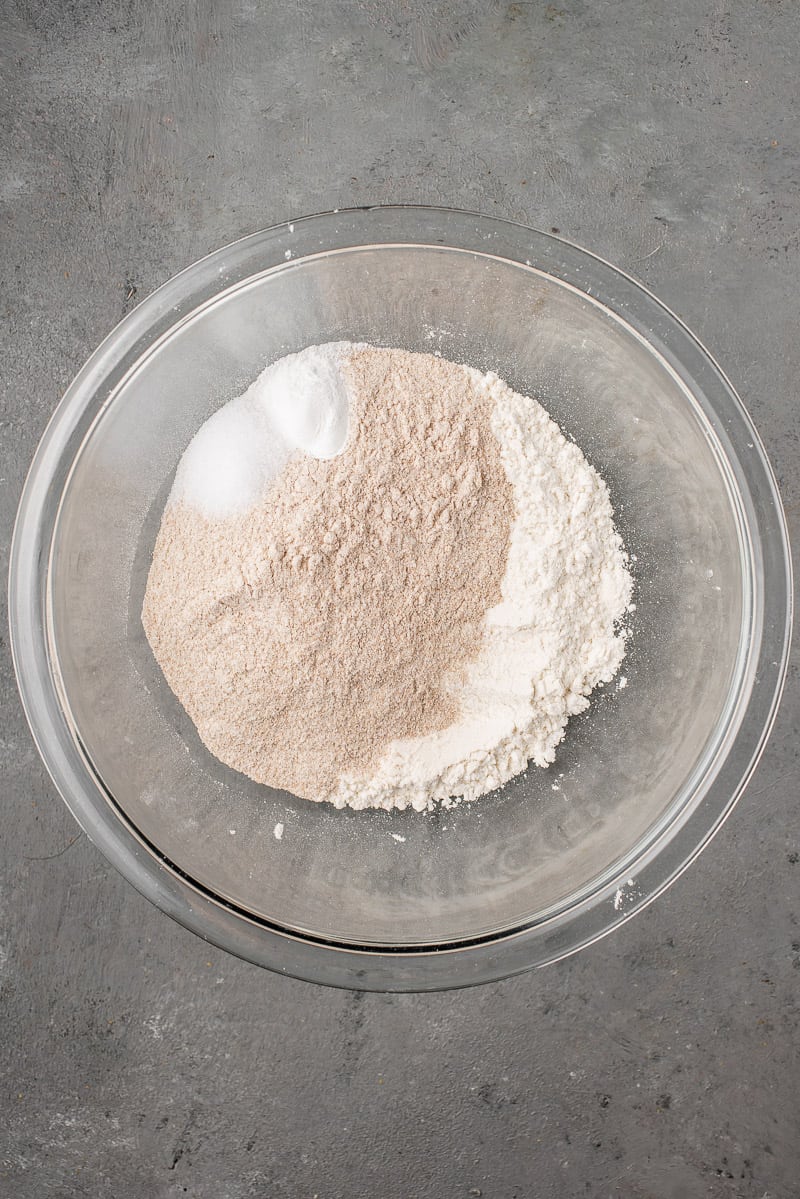
- Using a spatula, gradually begin to add in the flours. Mix with a spatula until it is cool enough to work with floured hands until a dough forms. You want the dough to be nice and smooth, not sticky. If it is sticking to your hands, then add 1 teaspoon of flour at the time until it’s no longer sticky. Don’t add too much flour as that will make your tortillas hard later on. Knead the dough for 10 minutes, or until the dough is smooth and elastic.
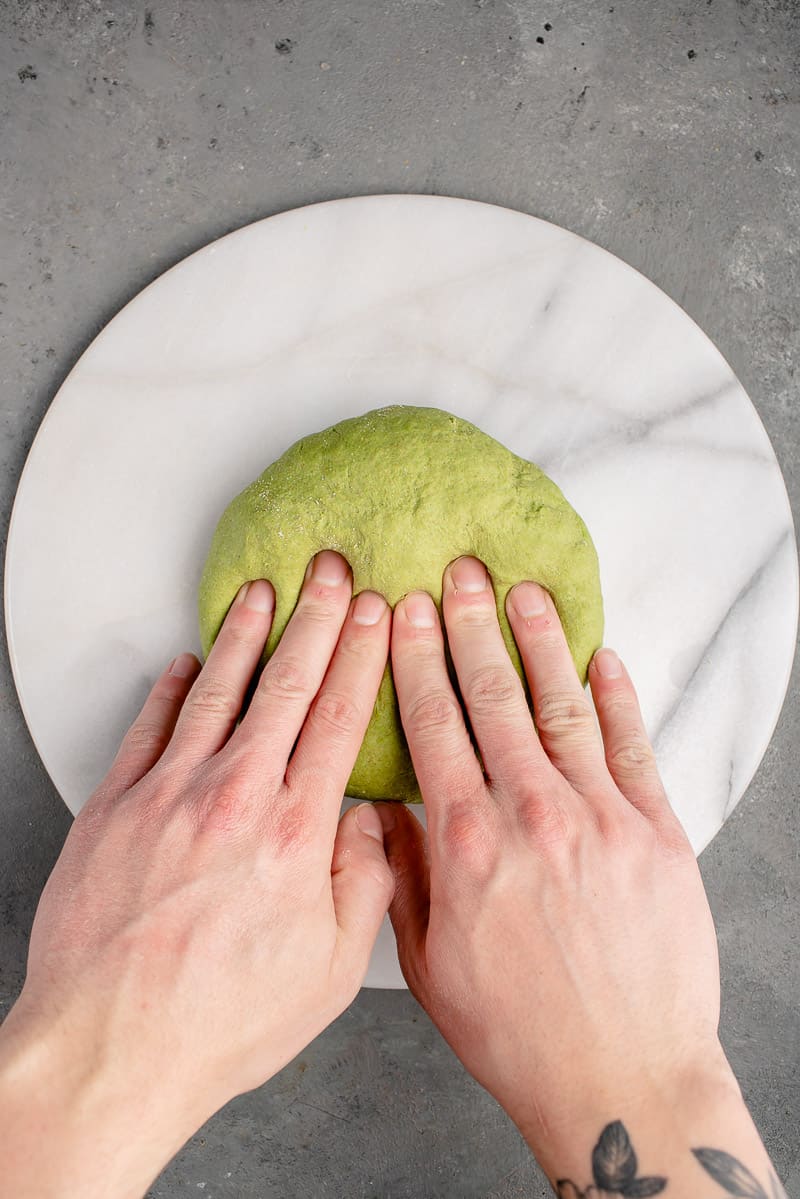
- Grease the inside of the same bowl that you were already using (we used shortening but you can use any oil) and add the ball of dough into the bowl.
- Cover with plastic wrap or a damp kitchen towel and allow it to rest covered for 30 minutes to one hour. Do not skip this step! To test if the dough is ready, roll out a test tortilla and if the dough keeps shrinking back when you try to roll it, let it rest for another 15-30 minutes.
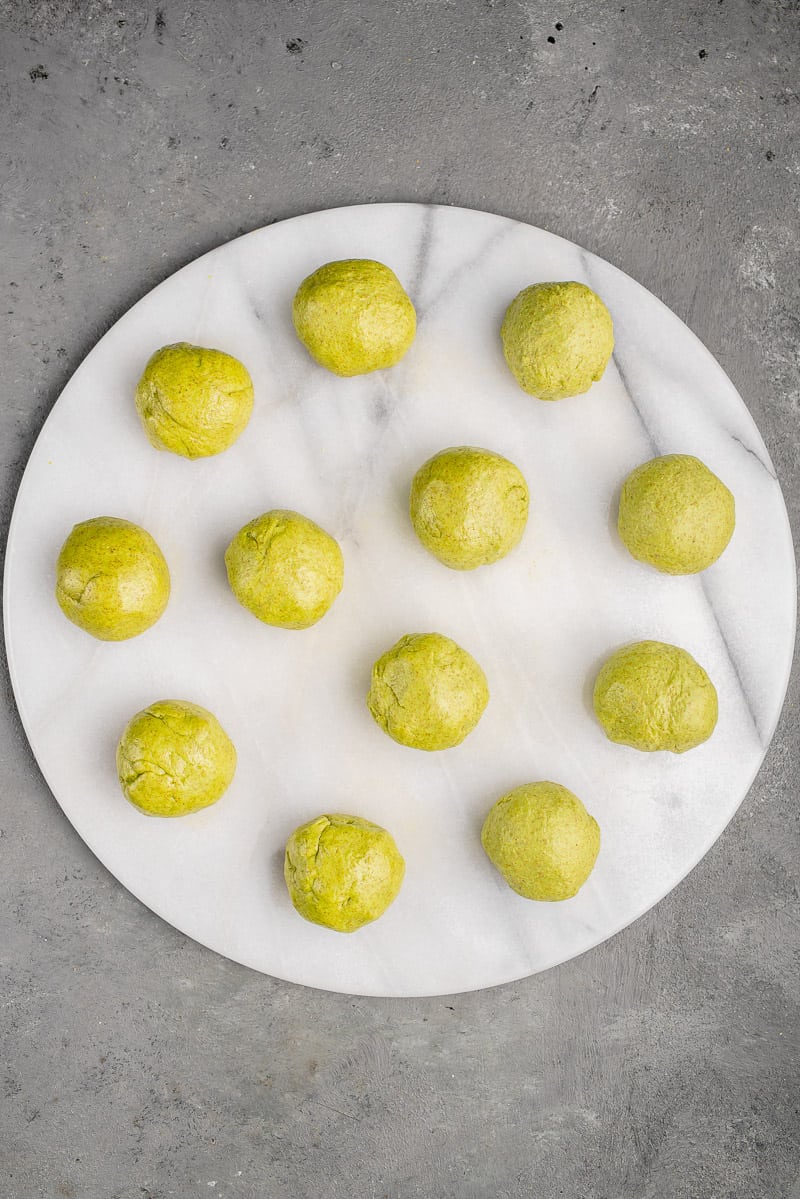
- Once the dough has rested, divide the dough into 12 even pieces. We like to weight ours for accuracy. Roll each into a small ball and set them all aside on your clean work surface. Cover the dough balls with a wet kitchen towel until ready to use.
- Heat a large comal or griddle to medium-low heat.
- Next, roll out the tortillas. You can do this with a press or with a rolling pin. Lightly flour a clean work surface as well as on your rolling pin. Grab one of the dough pieces and begin to roll out the tortilla. Roll the dough up and down, and then turn the dough 45 degrees and roll up and down again. Continue to do this until you have rolled your dough out into a ~8 inch in diameter circle and it looks somewhat translucent if you hold it up to the light.
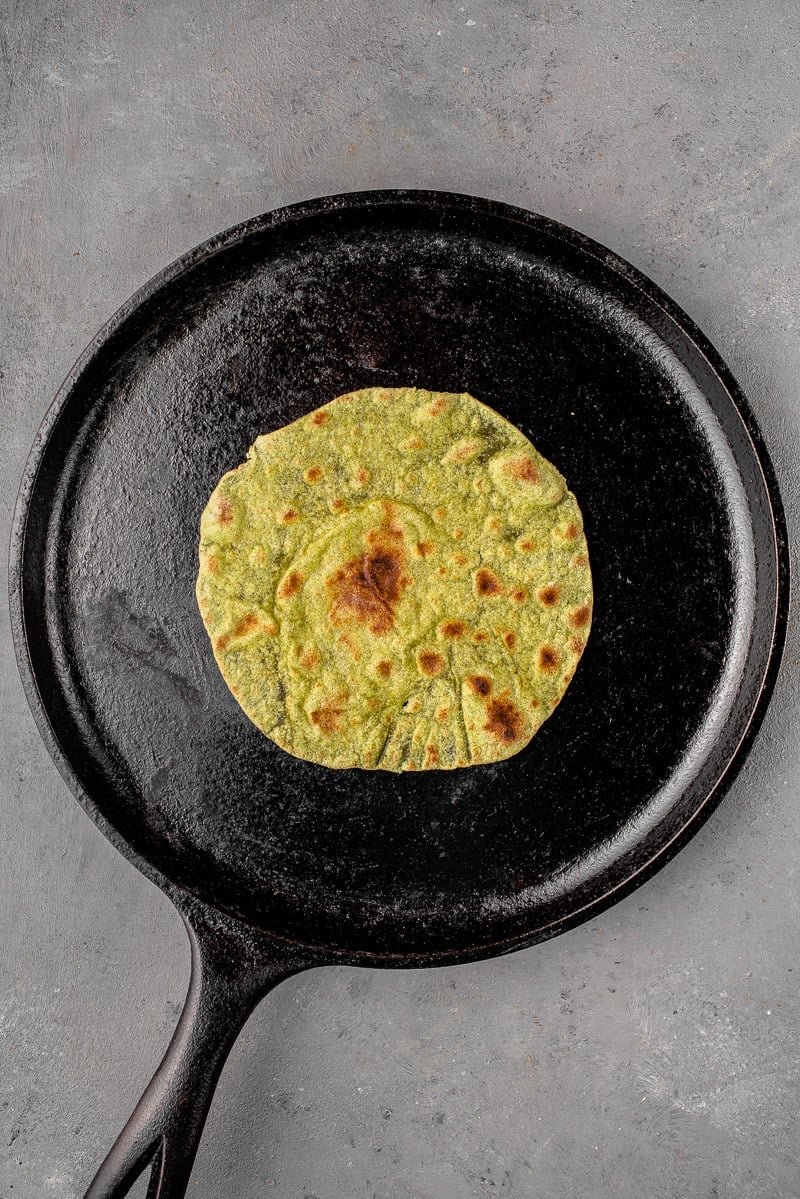
- Place the tortilla on the hot griddle and cook for 45-60 seconds on each side, or until light brown spots form. As one tortilla cooks, roll out the next to expedite the process. It can take a few tries to get the heat right! The first tortilla is usually a tester. If you’re getting black spots very fast on your tortillas, then your temp is probably too high. On the other hand, if it’s taking too long for it to get brown spots, then your temp is too low.
- Remove the tortilla from the griddle and immediately transfer it to a tortilla warmer or wrap it in a clean kitchen towel.
- Continue with the remaining dough until you have cooked all 12 tortillas. Enjoy!
- To store the tortillas, first allow them to cool completely, then place them into a sealable bag and store them in the refrigerator for up to 3 weeks.
Notes
- We made small tortillas but if you would like larger ones, you can divide the dough into 6 or 8 pieces instead of 12 and roll them out accordingly.
- If the tortillas are springing back and not holding their shape as you roll them out, then let the dough (or dough balls) rest for a little longer.
- You can either roll our by hand or with a tortilla press. We have found the best results rolling them manually by hand. I am not sure why but just wanted to note that!
- We have tried this recipe with both 50/50 all purpose to whole wheat flour and 100% whole wheat, and the 50/50 blend yielded the most desirable outcome. Although the 100% worked, it was not as soft and pliable, and to us not as enjoyable as the 50/50 blend.
- It can take a few tries to get the heat right! The first tortilla is usually a tester. If you’re getting black spots very fast on your tortillas, then your temp is probably too high. On the other hand, if it’s taking too long for it to get brown spots, then your temp is too low.
- Prep Time: 40 minutes
- Cook Time: 30 minutes
Disclaimer: The nutritional information shown is an estimate provided by an online calculator. It should not be considered a substitute for a professional’s advice. This page may contain affiliate links, which simply means that we earn a commission if you purchase through those links, but your price remains the same. Thank you for supporting Sweet Simple Vegan!


Have you tried this with gluten-free flour? I would love to know your comments.
We have not!