This post may contain affiliate links. Please read our disclosure policy.
This Vegan Chocolate Pumpkin Mousse Tart is the perfect fall dessert. It combines rich dark chocolate, creamy pumpkin and a secret ingredient to make a fluffy consistency that everyone will love, vegan or not! Serve in our buttery, oat hazelnut crust or enjoy as is with a big dollop of coconut whip cream!
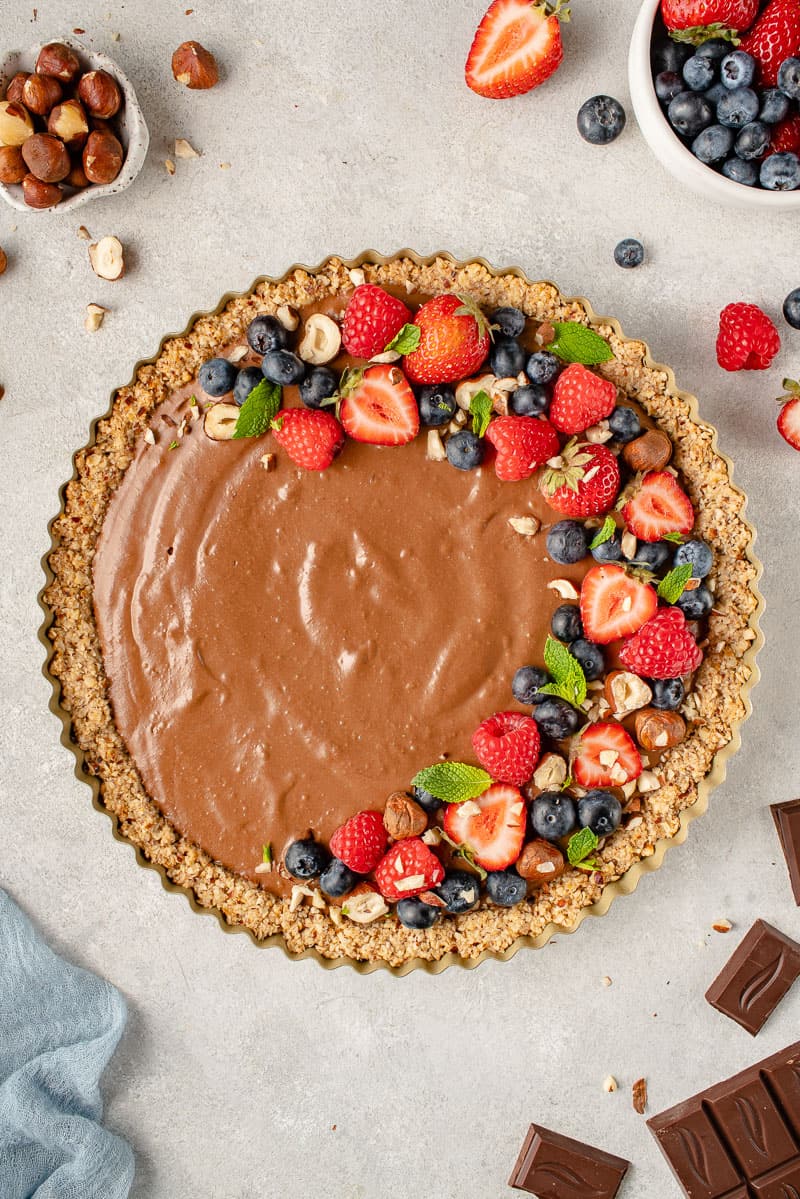
Table of Contents
We originally developed this creamy pumpkin mousse as part of our Vegan Chopped Challenge series we did with our friend Caitlin from From My Bowl! To this day, it’s still one of our favorite pumpkin recipes and one of our easy Vegan Thanksgiving Recipes we recommend every year.
There’s no weird ingredients, no complicated recipe steps, and no gluten! Just simple, whole foods and a whole lot of fall flavor.
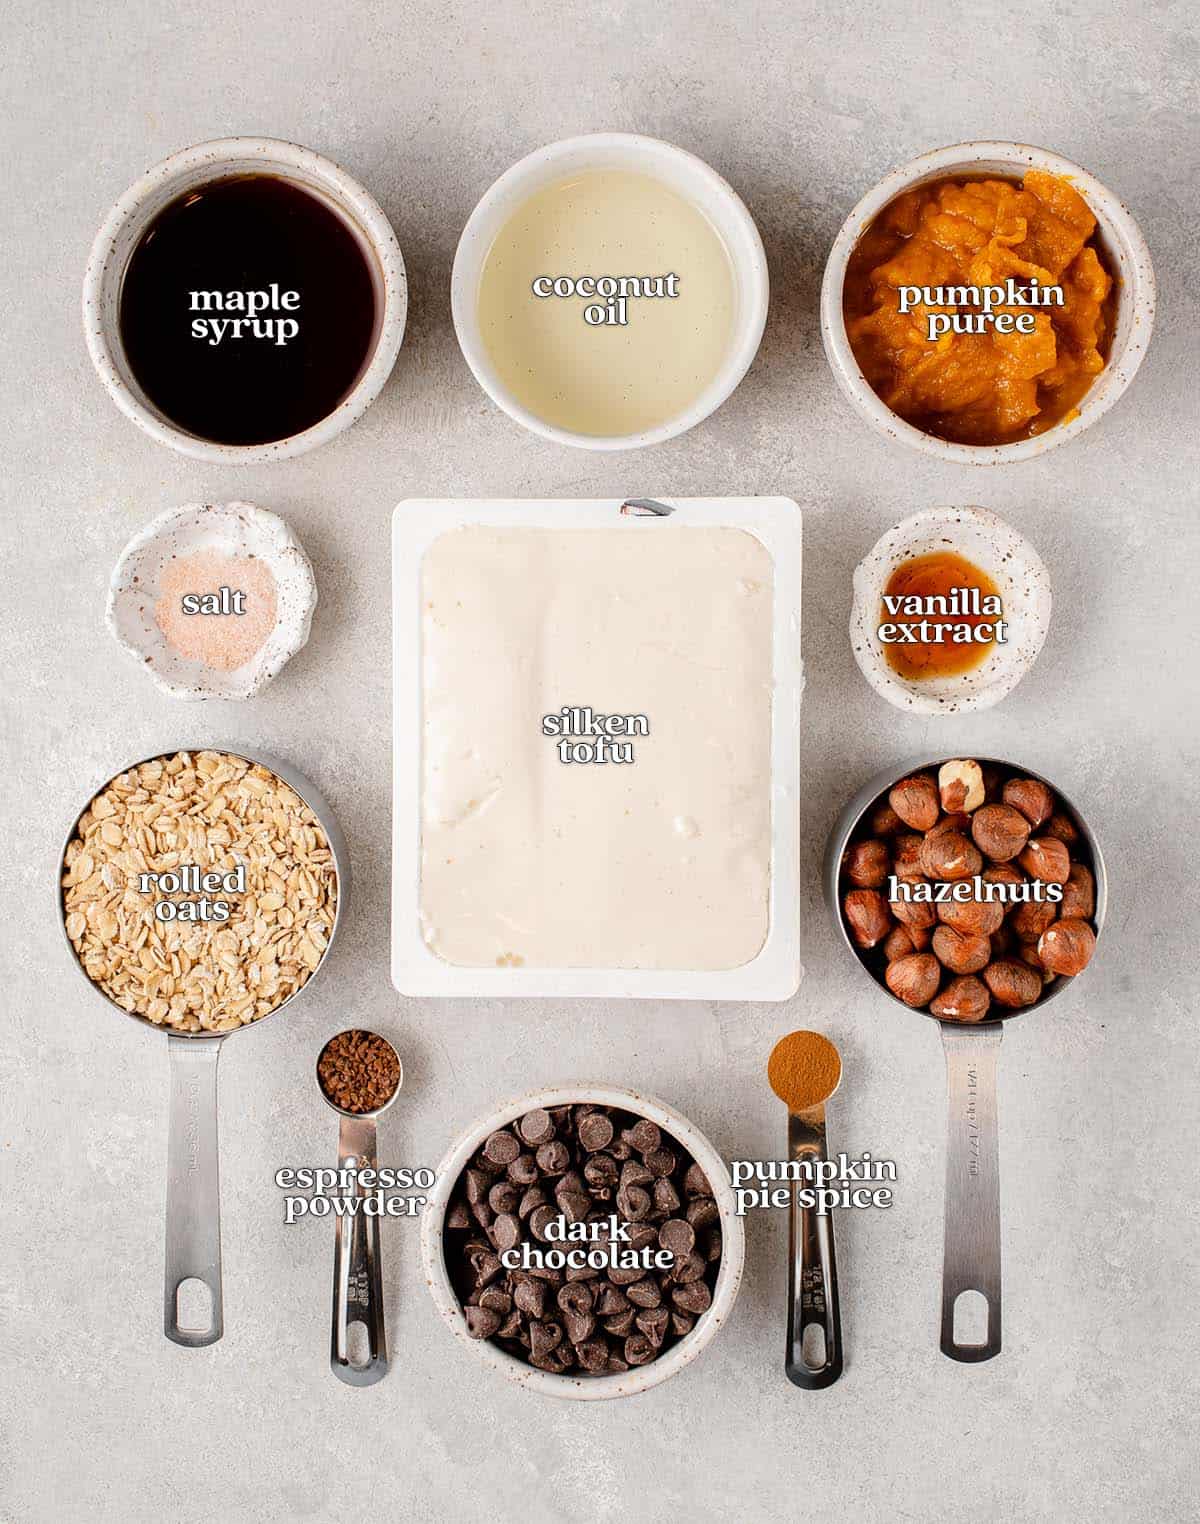
Ingredients You’ll Need
For the Chocolate Pumpkin Mousse
- Chocolate: We love the rich flavor of dark chocolate in this vegan pumpkin mousse, but opt for semi-sweet chocolate, if preferred. Use your favorite chocolate chips, chocolate chunks, or a chopped chocolate bar.
- Pumpkin puree: To make this mousse quick and simple, we oped for canned pumpkin puree. If preferred or needed, make your own homemade pumpkin puree with fresh pumpkin or substitute canned butternut squash puree or sweet potato puree.
- Silken tofu: This custard-like tofu acts as the creamy, dairy-free base for this mousse and provides both structure and a thick, velvety consistency. Make sure to use silken tofu, firmer types of tofu are not the right texture.
- Maple syrup: Naturally sweetens this tart without the need for refined sugars. If preferred, opt for another liquid sweetener such as agave.
- Vanilla extract: Adds warm, aromatic, hints of vanilla that add depth of flavor to the pumpkin mousse. For the best flavor, we recommend pure vanilla extract.
- Pumpkin pie spice: Helps enhance the pumpkin flavor in this mousse and adds to the overall taste. We used a pre-made mix, but feel free to make your own or substitute cinnamon.
- Instant espresso powder: Optional, but a small pinch of espresso powder intensifies the chocolate flavor. Make sure to use instant powder so the espresso mixes in seamlessly.
For the Optional Tart Crust
- Hazelnuts: Adds a rich, nutty flavor to the crust! We have only tested this tart crust with raw hazelnuts. Roasted hazelnuts will work, but will create a stronger, more like flavor.
- Oats: We used rolled oats to keep this tart crust wholesome and naturally gluten-free. If you are serving this fall dessert to someone that is gluten intolerant, make sure to use gluten-free certified oats.
- Coconut oil: Acts as the fat component in this tart crust and helps bind the ingredients into a crisp and buttery crumb. If you do not care for the subtle flavor of coconut, use refined coconut oil.
- Maple syrup: In addition to sweetening the vegan pumpkin mousse, we use a small amount of maple syrup to sweeten the crust and balance the flavor.
Equipment Needed
- Tart pan
- Food processor
- Double boiler (can use a small pot and glass bowl that is large enough to sit on top)
- Spatula
How to Make Vegan Chocolate Pumpkin Mousse
- Melt the chocolate. Prepare a double boiler using a pot filled with water and a large glass bowl that fits over the top of the pot. Once the water has come to a boil, lower the heat to a simmer and add the chocolate to the glass bowl. Stir frequently while the chocolate melts, scraping down the sides of the bowl as needed.
- Blend the mousse ingredients. Transfer the melted chocolate along with the pumpkin puree, silken tofu, maple syrup, vanilla extract, pumpkin pie spice, and instant espresso powder to a high-speed blender. When ready, the mousse should be a smooth, fluffy texture.
How to Make a Homemade Tart Crust
- Process the crust ingredients. Into the bowl of a large cup food processor, add the hazelnuts, rolled oats, maple syrup, coconut oil, and sea salt. Process until a uniform mixture forms, scraping down the sides as needed. When the crust is done, it should stick together when pressed in between your fingers. If it is too dry, add water 1 teaspoon at a time until it does.
- Press the mixture into a tart pan. Firmly press the crumb mixture into the bottom and up the sides of the tart pan. Fill any holes or breaks in the crust as needed.
- Blind bake the crust. Transfer the tart pan into the oven and bake for 15 minutes, or until golden brown. Transfer the tart pan to a wire rack and cool to room temperature.
Assemble the Tart
- Fill the tart crust. Pour the vegan pumpkin mousse into the cooled tart crust. Using a spatula or the back of the spoon, smooth the top of the mousse out, evenly filling the tart as best you can.
- Chill for at least one hour. Place the tart in the refrigerator to set for at least one hour, or overnight.
- Decorate and serve. Top the tart with your desired toppings, then slice and enjoy while chilled!
Topping Ideas
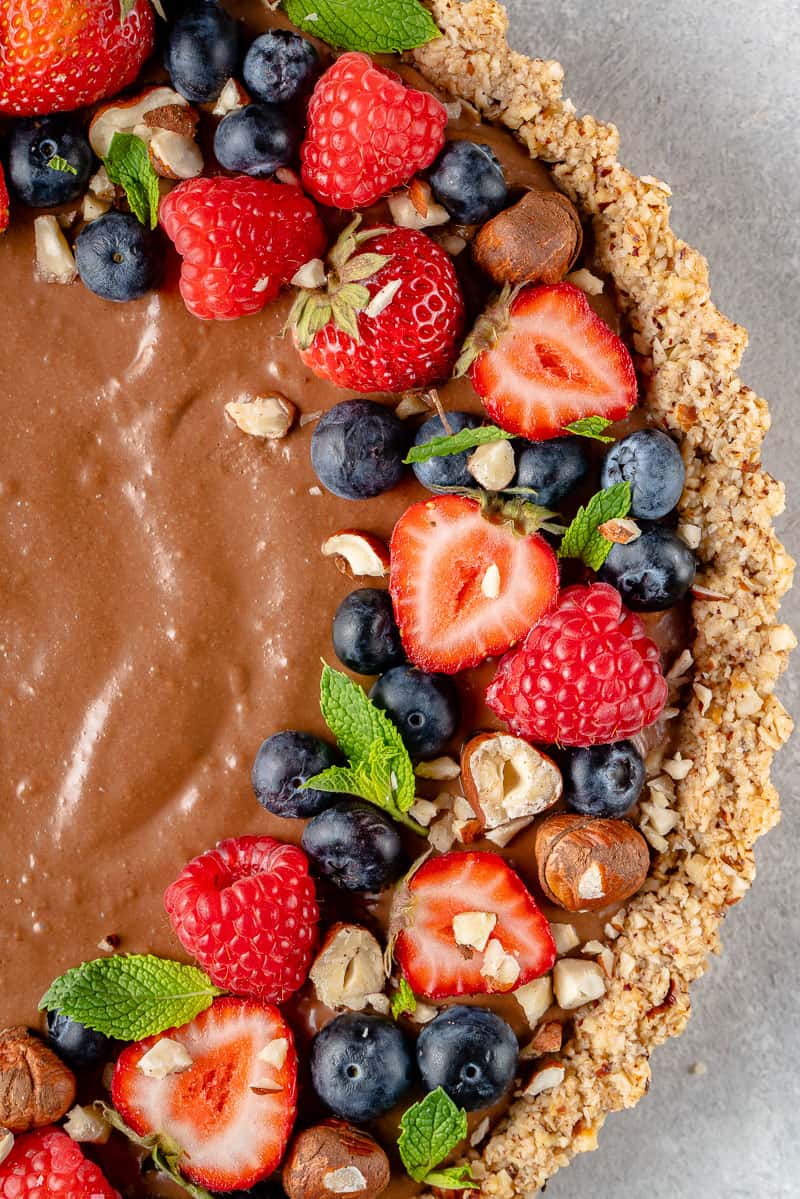
To take this tart to the next level, we topped it with an assortment of berries and fresh mint to make it look as beautiful as it tastes. You can decorate your mousse tart with just about anything! Here are a few of our favorite ideas:
- Chopped hazelnuts
- Candied pecans
- Pumpkin seeds
- Crushed ginger molasses cookies
- Mixed berries
- Fresh mint
- Chocolate shavings
- Dusted cocoa powder or powdered sugar
- Edible flowers
- Coconut whipped cream
Recipe FAQs
Traditional mousse is commonly made with gelatin to give the mousse its smooth and creamy texture. Thankfully, creating a fluffy mousse without gelatin is not only easy but no one will notice the difference!
Yes! This delicious pumpkin mousse can also be whipped together in a large cup food processor. If you are without a blender and food processor, you might be able to blend this mousse together using an electric hand mixer or stand mixer. Note that we have not tried this and can’t confirm the texture will be the same.
Instead of serving the chocolate pumpkin mousse in a tart, try serving it in small drinking glasses, wine glasses, small mason jars or ramekins for single serve portions!
We have not personally tested this and do not have a lot of experience with these ingredients. For best results, we recommend using maple syrup.
Storage Instructions
Once assembled, this tart will keep for 2-3 days in the refrigerator, tightly covered in plastic wrap. If you are preparing this healthy dessert for Thanksgiving dinner or other gatherings during the holiday season, both the mousse and tart crust can be prepared up to 24 hours in advance and stored separately (tart crust tightly covered at room temperature and mousse refrigerated).
We have not tested freezing the vegan pumpkin mousse or the tart crust but would not recommend it. The mousse texture will change upon thawing and likely separate/become watery.

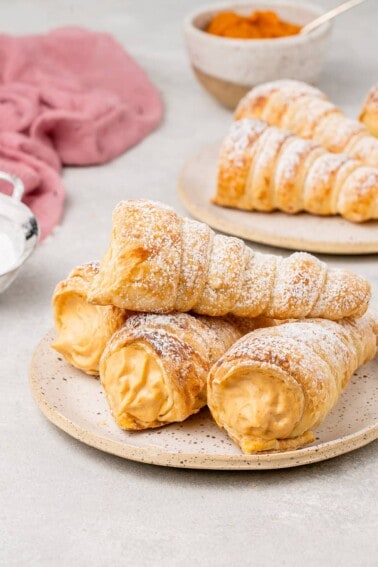
More Vegan Pumpkin Recipes You May Enjoy:
Make sure you tag us on Instagram @sweetsimplevegan and @consciouschris and hashtag #sweetsimplevegan if you recreate any of our recipes, we love to see your photos!

Vegan Chocolate Pumpkin Mousse Tart Recipe
- Total Time: 1 hour 45 minutes
- Yield: 8 servings 1x
Description
This Vegan Chocolate Pumpkin Mousse Tart is the perfect fall dessert. It combines rich dark chocolate, creamy pumpkin and a secret ingredient to make a fluffy consistency that everyone will love, vegan or not! Serve in our buttery, oat hazelnut crust or enjoy as is with a big dollop of coconut whip cream!
Ingredients
Crust
- 1 cup raw hazelnuts
- 2 cups gluten-free rolled oats
- 1/3 cup liquid coconut oil* (see notes for oil-free option)
- 1/4 cup maple syrup
- pinch of salt
Filling
- 7 oz. dark chocolate*
- 1/2 cup pumpkin purée
- 1 block (16 ounces) silken tofu
- 1/2 cup maple syrup
- 1 teaspoon vanilla extract
- 1/2 teaspoon pumpkin pie spice (or cinnamon)
- ½ teaspoon instant espresso powder (optional, but recommended)
Instructions
- Preheat the oven to 350°F and lightly grease a tart pan.
- Prepare the crust: In a food processor, add hazelnuts, gluten-free rolled oats, maple syrup, coconut oil, and salt. Process until uniform, scraping down the sides as needed. When the crust is done it should stick together when pressed in between your fingers. If it doesn’t stick, you can add water 1 teaspoon at a time until it does.
- Transfer the mixture to the greased tart pan. Press the crust mixture firmly into the bottom and up the sides of the tart pan, being sure there are no holes or breaks present in the crust.
- Place the tart pan into the oven and bake for 15 minutes, or until browned. Transfer the tart pan to a wire rack and cool until the crust reaches room temperature. The crust will dry out and crisp up while it cools.
- While the crust bakes, prepare the filling. Prepare a double boiler * to melt the chocolate. Once the water has come to a boil, lower it to a simmer and add the chocolate to the top of the double boiler, stirring frequently and scraping down the sides with a rubber spatula until melted.
- Transfer the melted chocolate along with the pumpkin purée, silken tofu, maple syrup, vanilla, pumpkin pie spice, and instant espresso powder into a high-speed blender and run until smooth.
- Pour chocolate mixture into the cooled base and smooth it out as best you can with either an offset spatula or regular spatula. Place into the refrigerator for at least 1 hour to set.
- Decorate the tart as desired. We chose an assortment of berries, crushed and whole hazelnuts, and mint. Enjoy!
Notes
- Oil-free option: We have tested this crust with 1/4 cup almond butter in place of the coconut oil for an oil-free option. The crust was more crumbly than the oil-option and was a bit harder to get out of the pan, so we recommend lining the pan with parchment paper or giving the pan a good greasing before filling it with the crust.
- You can use vegan milk chocolate instead of the dark if preferred, but just keep in mind that you may not need as much maple syrup in the filling as the milk chocolate will provide sweetness.
- Store the tart in the refrigerator, covered, for 4 days.
- You may replace the hazelnuts with another nut if needed. It will not yield the same chocolate hazelnut flavor, but I think it will still be yummy!
- Prep Time: 1 hour 30 minutes
- Cook Time: 15 minutes
- Category: Dessert, Fall
- Method: Baking
- Cuisine: Vegan, Gluten-free
Nutrition facts label provided by Nutri Fox.
Disclaimer: The information shown is an estimate provided by an online nutrition calculator. It should not be considered a substitute for a professional’s advice. This page may contain affiliate links, which simply means that we earn a commission if you purchase through those links, but your price remains the same. Thank you for supporting Sweet Simple Vegan!


I made this as a gluten-free dessert option at my wedding. It was easy to prepare the day before and I decorated it similarly with fresh berries, crushed hazelnuts, and mint leaves and it turned out beautiful. My gluten intolerant friends really loved it and I was lucky to finish it off in the days following. This recipe is a winner, and the filling reminds me of brownie batter!
Hi Madison! We are so stoked that you were able to share this on such a special day 🙂 Thank you for sharing and congrats!